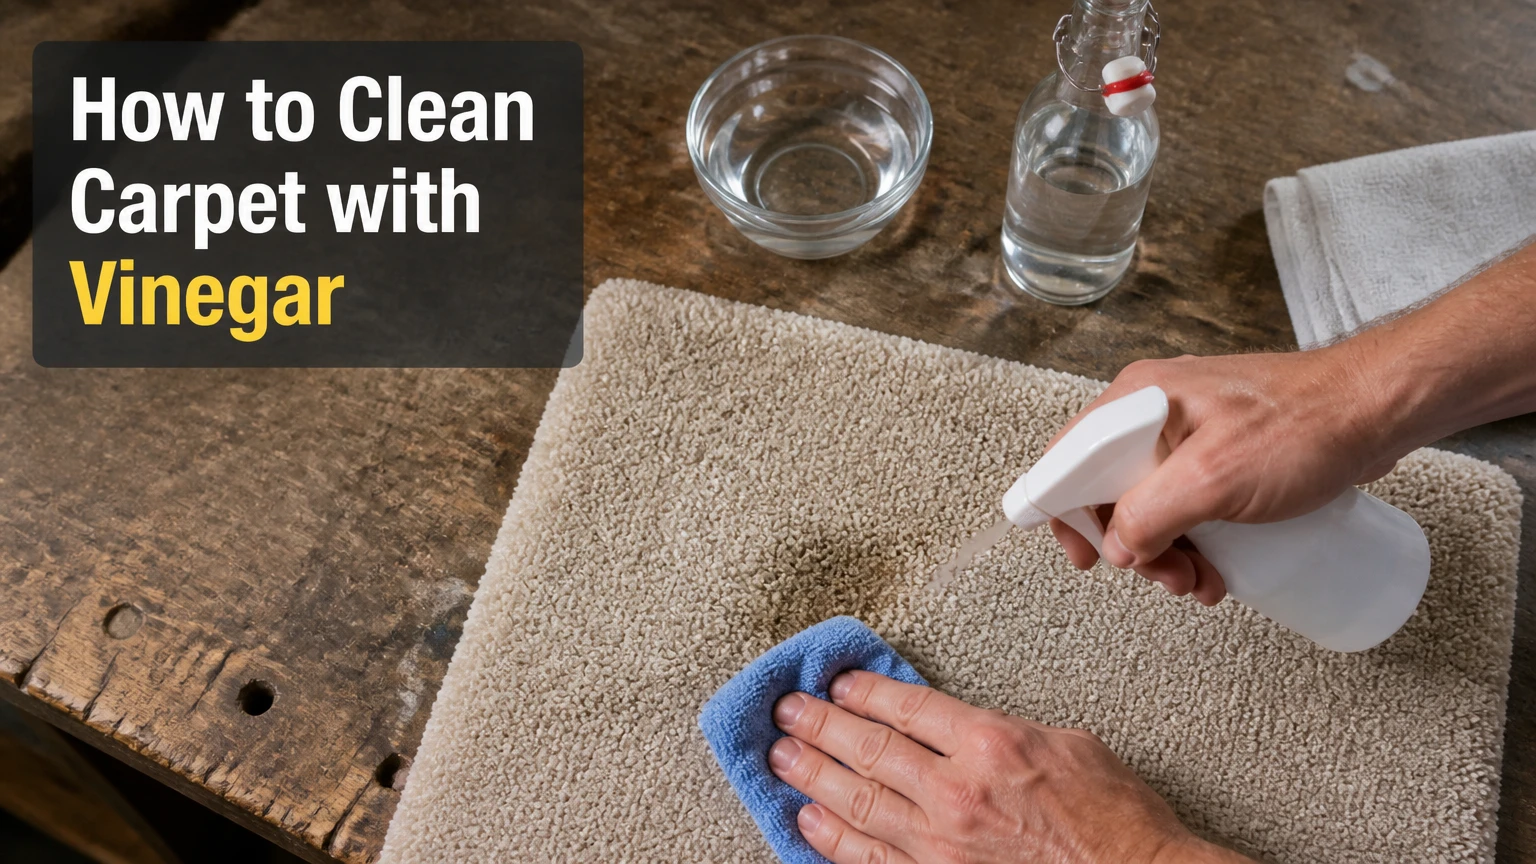
Learning how to clean carpet with vinegar requires mastering a precise seven step method that neutralizes odors and dissolves grime without harsh chemicals. This process takes under two hours of active work, utilizes simple household tools, and relies entirely on preventing over saturation to achieve a flawless, residue free result.
Before You Start
Do not begin this process until you have gathered all necessary materials and prepared your space. Attempting to locate tools while your carpet is damp will lead to uneven cleaning and potential damage.
- Total Active Time: 1 to 2 hours
- Total Drying Time: 4 to 8 hours
- Difficulty Level: Beginner
- Estimated Cost: $5 to $15
Required Tools and Materials
- Distilled White Vinegar: Must be exactly 5 percent acidity. Do not use apple cider or red wine vinegar, which contain sugars and natural dyes that will stain fibers.
- Warm Tap Water: Maximum temperature of 60 degrees Celsius (140 degrees Fahrenheit).
- High Filtration Vacuum Cleaner: Preferably with a HEPA filter and a freshly emptied canister or new bag.
- Heavy Duty Spray Bottle: Must have a fine mist setting.
- White Microfiber Cloths: Secure at least 5 to 10 clean, bright white cloths. Colored towels will transfer dye to damp carpet.
- Soft Bristled Scrub Brush: Nylon bristles are ideal. Stiff bristles will tear the carpet pile.
- Baking Soda: Optional, but required for heavy deodorizing and pet stains.
- Climate Control: An electric floor fan, ceiling fan, or a dehumidifier to accelerate dry times.
Prerequisite Conditions
Clear all furniture from the target area. If moving heavy wooden furniture is impossible, wrap the bottom three inches of the furniture legs tightly in aluminum foil or plastic wrap. Damp carpet will pull wood stain and varnish off furniture legs, creating permanent secondary stains on your floor.
Phase 1: Preparation and Testing
Proper preparation determines the success of the entire operation. Skipping these initial steps guarantees that dirt will turn into mud and dyes will bleed.
Step 1: Execute a Deep Dry Vacuuming
Vacuum the target area thoroughly in overlapping horizontal and vertical grids. Empty your vacuum canister or install a fresh bag before starting. Adjust the vacuum height so the beater bar gently vibrates the carpet rather than grinding into it. Push the vacuum slowly in straight lines from north to south across the entire area, and then repeat the process moving east to west. This cross hatching method requires 10 to 15 minutes but extracts deeply embedded loose dust, pet dander, and human hair.
You will know it worked when the carpet pile stands uniformly upright and no visible debris remains on the surface.
Common mistake at this step: Rushing the vacuum process. If you skip this step or rush it, applying liquid later will turn the dry dirt into a highly abrasive mud slurry that sinks permanently into the carpet backing.
Step 2: Perform a Colorfastness Test
Test your vinegar mixture on an inconspicuous corner of the carpet. Mix a small amount of your intended solution (1 part vinegar to 3 parts warm water) and locate a hidden area of carpet, such as inside a closet or under a heavy piece of furniture. Spray the solution onto the test area until lightly damp. Wait exactly five minutes. Take a clean, dry white microfiber cloth and press it firmly into the damp spot for ten seconds.
You will know it worked when you inspect the white cloth and see absolutely zero carpet dye transferred onto the fabric.
Common mistake at this step: Assuming all synthetic carpets are colorfast. If you skip the test and your carpet bleeds dye, the vinegar will permanently bleach or alter the color of your flooring. If dye transfers during this test, stop immediately and hire a professional.
Phase 2: Application and Extraction
The chemical action of the acetic acid in the vinegar performs the heavy lifting during this phase. Precision in mixing and application prevents structural damage to the carpet.
Step 3: Mix and Apply the Vinegar Solution
Mist your selected vinegar and water solution lightly across the stained area. First, determine your correct mixture ratio based on the severity of the problem. For general maintenance, mix 1 part white vinegar to 3 parts warm water. For high traffic areas, mix 1 part vinegar to 2 parts warm water. For pet odors, mix 1 part vinegar to 1 part warm water. Ensure the water temperature does not exceed 60 degrees Celsius (140 degrees Fahrenheit). Fill your spray bottle, set the nozzle to a fine mist, and hold it 6 to 8 inches above the carpet. Spray evenly.
You will know it worked when the surface of the carpet feels damp to the touch but the base of the fibers near the backing remains entirely dry.
Common mistake at this step: Pouring the solution directly from a bucket or using a heavy stream setting on the spray bottle. This drenches the carpet pad, leading to mold growth and delamination of the carpet glue.
Step 4: Allow Proper Dwell Time
Leave the applied solution completely undisturbed for five to thirty minutes. For light dirt and basic refreshing, set a timer for 5 to 10 minutes. If you are treating severe pet urine and have applied a 1 to 1 vinegar solution over a thin layer of baking soda, allow the mixture to sit for a full 30 minutes. During this period, the acetic acid chemically detaches the oils, grease, and dirt molecules from the synthetic or natural carpet fibers.
You will know it worked when visible stains begin to blur at the edges, indicating that the chemical bond between the dirt and the fiber has broken.
Common mistake at this step: Rushing to scrub immediately after spraying. Scrubbing before the acetic acid has time to break down the grime forces you to rely on mechanical friction, which damages the carpet pile.
Step 5: Agitate and Blot the Fibers
Press a dry white microfiber cloth firmly into the treated carpet fibers. For stubborn, localized spots, take your soft bristled brush and make tiny, gentle circles over the stain for no more than 30 seconds. Immediately follow by folding a white microfiber cloth into a square, placing it flat over the damp area, and pressing straight down with the heel of your hand or your body weight. Hold the pressure for five seconds. Lift the cloth, fold it to reveal a clean, dry section, and repeat the downward pressure.
You will know it worked when the cloth lifts away with dark, visible soil transferred from the carpet onto the white fabric. Continue this process until no more dirt transfers to your cloth.
Common mistake at this step: Scrubbing aggressively back and forth with the towel. This motion causes “pile distortion,” which permanently untwists and frays the carpet fibers, leaving a fuzzy, damaged texture.
Phase 3: Rinsing and Drying
Vinegar leaves behind a mild acid residue that can attract future dirt if not properly neutralized. This final phase restores the carpet to a pristine, neutral state.
Step 6: Execute a Pure Water Rinse
Spray the treated area lightly with plain warm water to remove residual acid. Empty your spray bottle of any remaining vinegar mixture and rinse the bottle thoroughly. Fill it with plain warm tap water. Mist the previously treated area lightly. Take a fresh, completely dry white microfiber cloth and perform the exact same downward blotting technique utilized in Step 5. This extracts the remaining dirt, baking soda, and vinegar residue.
You will know it worked when the blotting towel pulls up completely clear liquid and the strong scent of vinegar begins to dissipate.
Common mistake at this step: Skipping the rinse. Leaving acidic vinegar or alkaline baking soda residue in the carpet fibers creates a sticky surface that attracts dust rapidly, causing the spot to look dirty again within weeks.
Step 7: Accelerate the Drying Process
Direct a high velocity fan immediately at the damp carpet patch. Turn on any ceiling fans in the room, position a floor fan to blow horizontally across the surface of the carpet, and open nearby windows if the outside humidity is low. If you live in a highly humid environment, close the windows and turn on a mechanical dehumidifier in the center of the room. Keep all foot traffic completely off the area until it is fully dry. This passive drying phase typically requires 4 to 8 hours.
You will know it worked when you can press a dry paper towel firmly into the carpet and it comes away completely dry to the touch.
Common mistake at this step: Allowing the carpet to air dry slowly with poor ventilation. Slow drying traps moisture in the lower levels of the carpet pile, which promotes mildew growth and triggers a phenomenon known as wicking.
Common Mistakes and How to Fix Them
Even when following instructions closely, environmental factors or slight miscalculations can lead to imperfect results. Here are the most frequent failure modes and the exact recovery protocols.
1. Over Saturating the Carpet Padding
If you accidentally spilled the mixture or sprayed far too heavily, moisture will seep into the under pad. This traps liquid where fans cannot reach it, leading to a lingering musty smell or mold growth. How to fix it: Immediately place a stack of thick, dry white towels over the saturated area. Place a heavy object, such as a stack of books wrapped in a plastic bag, on top of the towels. Leave it for 12 hours to forcefully wick the moisture upward. Follow up by pointing a fan directly at the spot for 24 hours.
2. The Carpet Feels Crunchy or Stiff
A stiff, crunchy texture after the carpet dries means you used too much baking soda or failed to perform an adequate clean water rinse in Step 6. How to fix it: Lightly mist the crunchy area with plain warm water to reactivate and dissolve the crusty residue. Blot it vigorously with a dry towel. Once it is completely dry again, run your vacuum over the area very slowly to break up and extract the remaining crystallized minerals.
3. Wicking Reappearing Stains
Wicking occurs when the carpet backing gets too wet. As the surface fibers dry, capillary action draws deeply embedded dirt and liquid back up from the base to the tips of the fibers, making an old stain reappear a day later. How to fix it: Sprinkle a very thin layer of dry baking soda over the reappeared dry spot. Mist it extremely lightly with a 1 to 3 vinegar solution. Let it dry completely for 2 hours, and then vacuum it up. The baking soda will act as a poultice, pulling the wicking stain into the powder rather than the fiber.
4. Bleeding Dyes from Colored Rags
If you ignored the material requirements and used a red or blue towel to blot a damp, acidic surface, the dye from the towel likely transferred directly into your carpet fibers. How to fix it: This is a severe failure mode. Do not apply more vinegar. Immediately blot the area with plain cold water and a white cloth. If the dye does not lift, you will need to purchase a specialized carpet dye transfer remover or contact a professional carpet restoration technician.
Process Variations for Specific Situations
The standard steps require modification based on the material of your carpet and the specific type of stain you are addressing.
Cleaning Natural Wool Carpets
Wool fibers are highly sensitive to heat and acid. If you have a wool or natural fiber carpet, you must alter the standard formula. Never use water hotter than 30 degrees Celsius (85 degrees Fahrenheit), as heat shrinks wool. Dilute your solution heavily to 1 part vinegar to 4 parts cold water. Limit the dwell time in Step 4 to a maximum of 5 minutes to prevent the acid from deteriorating the natural proteins in the wool.
Treating Heavy Pet Urine Accidents
Pet urine contains strong alkaline salts and uric acid crystals. For this specific scenario, you must introduce a heavy baking soda poultice. After soaking up the initial liquid with a dry towel, cover the entire stain with a dense, opaque layer of baking soda. Pour a 1 to 1 vinegar and water solution directly into a spray bottle and mist the baking soda until it bubbles vigorously. Let this mixture dry entirely over 24 hours before vacuuming.
Cleaning Entire Rooms Without a Machine
If you need to refresh an entire room rather than spot clean, working on your hands and knees with a towel is highly inefficient. Instead, sweep the entire room with your vacuum. Mist the 1 to 3 vinegar solution evenly over a 4 foot by 4 foot section. Take a clean, dry microfiber mop, press it firmly into the carpet, and push it in straight lines to absorb the surface grime. Change the mop head as soon as it becomes visibly soiled and move to the next section.
How Long Does It Take and What Does It Cost?
Understanding the time and financial commitment helps set realistic expectations for this deep cleaning project.
Active Cleaning Time: Spot cleaning a standard 2 foot by 2 foot area requires only 10 to 15 minutes of active labor. Cleaning an entire 12 foot by 12 foot room using the microfiber mop method requires 1.5 to 2 hours of continuous active work.
Passive Drying Time: Regardless of the size of the area, expect a minimum of 4 hours of drying time. In high humidity environments, or if you accidentally over applied the solution, drying can take up to 12 hours.
Total Cost Breakdown: This is one of the most cost effective home maintenance tasks. A standard gallon of 5 percent distilled white vinegar costs between $3 and $5. A large box of baking soda costs $2. If you need to purchase a new pack of white microfiber cloths and a heavy duty spray bottle, expect to spend an additional $10. Total project cost ranges from $5 for materials you likely already own, up to $17 for a full restock of supplies.
Frequently Asked Questions
Will the vinegar smell remain in the carpet permanently?
No, the sour smell is completely temporary. Acetic acid evaporates rapidly as it is exposed to moving air. Once the carpet is 100 percent dry to the touch, the vinegar odor will vanish completely, taking any previously trapped musty or pet odors with it.
Can I mix vinegar with hydrogen peroxide for tougher stains?
You must never mix vinegar and hydrogen peroxide in the same container. Combining them creates peracetic acid, which is highly corrosive and will instantly bleach carpet dyes and irritate your lungs. If you must use both, use them on entirely separate days.
Is it safe to use apple cider vinegar if I run out of white vinegar?
You cannot substitute apple cider vinegar. Apple cider and red wine vinegars contain natural sugars, tannins, and dark dyes. Spraying them on your carpet will leave a sticky sugar residue that rapidly attracts dirt and will permanently dye lighter colored carpets brown or red.
Do I need to extract the water with a wet vacuum?
While a wet shop vacuum makes the extraction step easier, it is not strictly required. Heavy downward blotting with highly absorbent microfiber cloths or thick cotton towels is perfectly sufficient to lift the moisture, provided you do not over saturate the carpet in Step 3.
How often should I clean my carpets using this vinegar method?
For general refreshing and deodorizing, performing this process every four to six months is ideal. Spot cleaning can be done immediately as spills happen. However, avoid soaking the same spot with acid weekly, as prolonged exposure can weaken synthetic glue backings over time.
Learning how to clean carpet with vinegar effectively eliminates the need for expensive, sticky commercial detergents. By strictly following exact dilution ratios, executing the crucial clean water rinse, and enforcing rapid drying times, you will permanently remove stubborn stains and restore the natural texture of your flooring.


