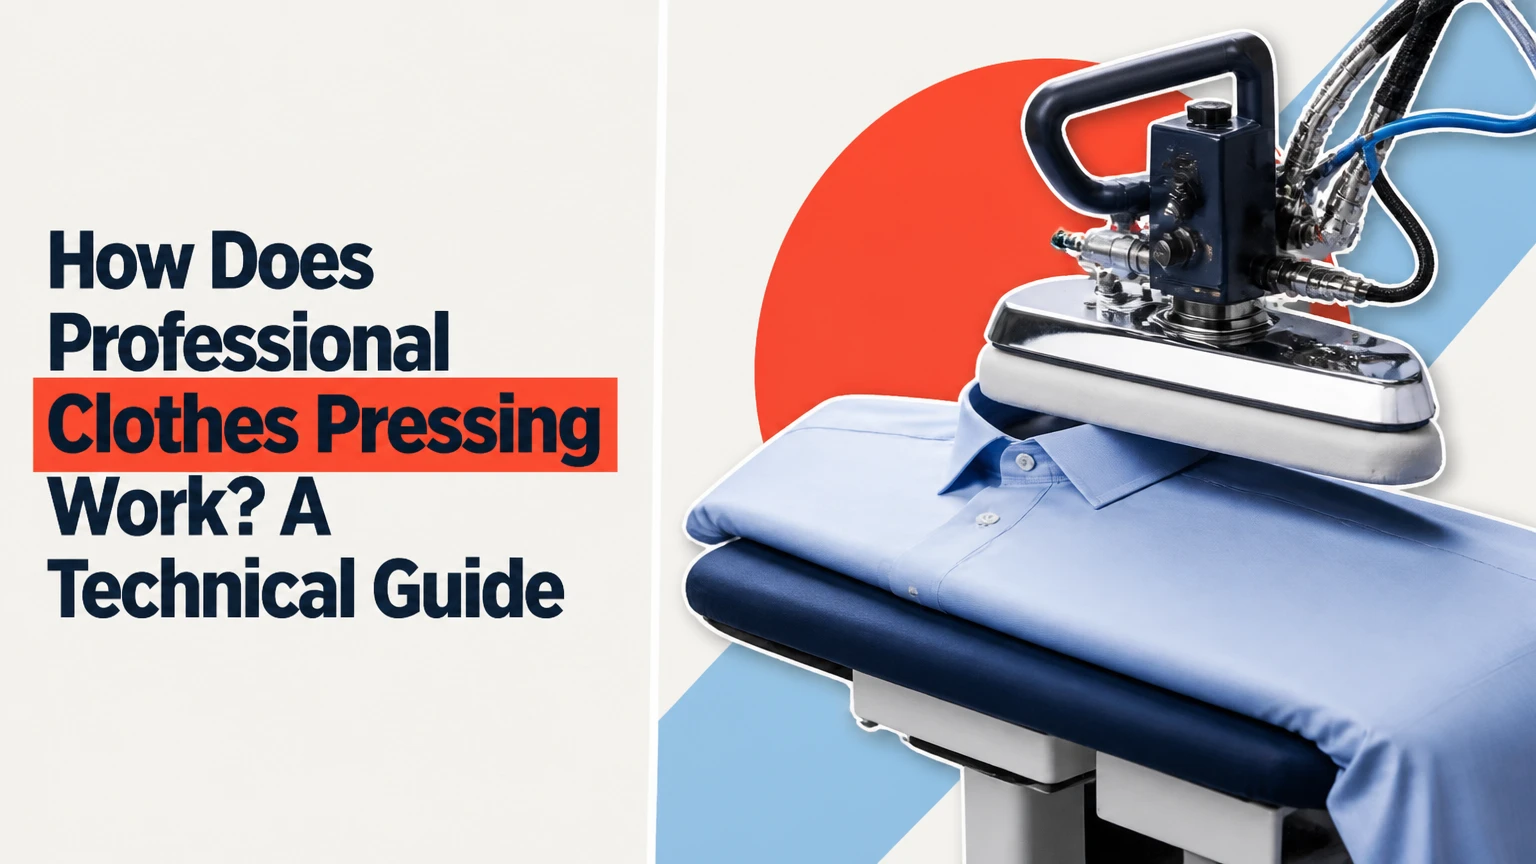
Professional clothes pressing reshapes fabric with controlled heat, moisture, pressure, and vacuum rather than dragging a hot iron across a garment. A technician relaxes textile fibers with steam, positions the garment on a padded buck or three-dimensional form, compresses or molds the fabric, then removes moisture and heat through vacuum suction to set the finish.
Key Facts at a Glance
- Professional pressing uses compression and controlled release, while home ironing mainly uses a sliding soleplate.
- A typical press clamp lasts about 5-15 seconds, but a complete garment usually requires several placements and 2-5 minutes of machine work.
- Vacuum suction pulls moisture and air through the garment, helping cool and stabilize the pressed shape.
- A form finisher is safer for jackets, coats, and dresses because it preserves three-dimensional structure.
- Pressing improves wrinkles and creases, but it does not replace stain removal, washing, or dry cleaning.
- Typical United States press-only prices range from $3-$6 for a shirt, $7-$12 for trousers, and $15-$25 for a two-piece suit.
What Is Professional Clothes Pressing?
Professional clothes pressing is a garment-finishing operation that uses a heated press head, a padded lower surface called a buck, steam, and vacuum to smooth or shape textile panels. The operator presses vertically, aligns seams and edges, and selects equipment according to the garment’s construction and fiber content.
Home ironing treats a garment as a mostly flat surface. Commercial pressing treats clothing as a shaped object. A trouser leg, for example, must be aligned at the inseam and outseam before pressure creates a crease; a jacket must retain its roll, canvas, shoulder line, and sleeve geometry.
Pressing may happen after laundering, dry cleaning, or spot treatment. “Press only” means the cleaner is finishing an already-clean garment, not cleaning it. That distinction matters because heat and pressure can set some stains more firmly.
What Does Pressing Change in Fabric?
Heat and moisture temporarily make many textile fibers more pliable, allowing a technician to flatten wrinkles or establish a new crease. Cooling and drying then stabilize the shape, although the finish is not permanent because later wear, humidity, washing, and movement relax the fibers again.
The common explanation about “breaking hydrogen bonds” is directionally useful for cotton, wool, and other fibers that respond to moisture and heat, but it is not a complete description of every textile. Polyester, nylon, elastane, resin finishes, coatings, interlinings, and blended fabrics respond through different combinations of thermal relaxation, mechanical deformation, and finish setting.
Professional pressing therefore depends on control rather than maximum heat. Excess heat can melt or glaze synthetic fibers, while excess pressure can flatten wool nap, damage fused interlinings, or create shine on dark suiting.
How Does Professional Clothes Pressing Work?
Professional clothes pressing follows a controlled sequence: inspect the garment, choose a surface and setting, position the fabric, apply steam and pressure, then vacuum the garment while it cools. The operator repeats the sequence across panels and finishes shaped details by hand.
The process is fast because the machine transfers heat and pressure over a broad area. A utility press can treat a shirt front or trouser panel in seconds, but the operator’s alignment decisions determine whether the result looks professional.
Step 1: Inspect the Garment and Care Label
The technician checks the fiber content, care symbols, lining, trim, buttons, stains, shine, existing creases, and construction defects. A wool jacket with a fused canvas, for example, requires different handling from a washable cotton shirt.
The care label supplies the garment manufacturer’s maximum treatment guidance, but it does not tell the operator every detail of the garment’s condition. A cleaner must also identify loose buttons, weak seams, delamination, heat-sensitive prints, sequins, leather trim, and moisture-sensitive dyes.
Success checkpoint: The operator can identify the safest pressing method and any pre-existing damage.
Common mistake: Pressing over an unidentified oily or protein stain can drive the mark deeper into the fiber.
Step 2: Select the Buck, Form, and Protective Cover
Flat panels go on a padded utility buck. Jackets, coats, and shaped dresses may go on a form finisher, where steam and air work around the garment’s natural volume rather than flattening it between rigid plates.
The buck cover affects the result. Clean, resilient padding distributes pressure; a compressed or contaminated cover can transfer texture, create uneven impressions, or hold moisture against the garment.
Success checkpoint: The garment rests without stretching, twisting, or exposing vulnerable trim to the press head.
Common mistake: Pulling a bias-cut dress taut can create a new distortion while removing the old wrinkle.
Step 3: Position and Align the Garment
The operator lays or mounts one section at a time, matching seams, hems, darts, pleats, and grain lines. Trouser creases require particular care because the crease must follow the intended leg line, not merely the current fold.
A foot-operated vacuum may hold the fabric against the buck. Vacuum is especially useful when a slippery lining, lightweight shell, or trouser panel might shift during closure.
Success checkpoint: Seams and edges meet their intended reference points before the head closes.
Common mistake: Trapping an old trouser crease beside a new one produces a permanent-looking double line.
Step 4: Apply Steam and Compression
Steam softens and heats the textile, while the upper head applies even pressure. Some machines deliver steam through the head, the buck, or both; the exact sequence depends on the machine design and garment.
Commercial machines may operate with boiler pressures around 70-120 psi, but boiler pressure is not the same as the force or temperature experienced by the garment. A cleaner may use lower effective settings, shorter contact, a protective shoe, or no direct steam for a delicate fabric.
Success checkpoint: The fabric relaxes without wet spots, color change, glazing, or flattening of surface texture.
Common mistake: Treating every dark wool jacket as if it needs the hottest setting and longest clamp.
Step 5: Hold, Dry, and Vacuum-Cool
After steam enters, the head may remain closed briefly so heat can travel through the fabric layers. The head then releases, and vacuum suction draws air through the buck, removing residual moisture and cooling the garment.
Vacuum does more than hold clothing still. Rapid cooling helps prevent moisture from leaving unevenly, which can cause water marks, lingering dampness, or a finish that relaxes before the garment reaches the hanger.
Success checkpoint: The pressed section is cool, dry, aligned, and free of a damp odor before the next section or final inspection.
Common mistake: Releasing a dense wool or lined garment before it has cooled can allow wrinkles to return.
Step 6: Hand-Finish Structured Details
Collars, lapels, sleeve heads, cuffs, pleats, ruffles, pockets, and narrow seam areas often need a hand iron, puff iron, sleeve board, or steam board. Hand finishing lets the operator apply localized pressure without crushing adjacent construction.
A puff iron is useful for sleeves and rounded areas. A form finisher is useful for jackets and coats because air and steam shape the garment from the inside rather than flattening a lapel or shoulder.
Success checkpoint: Details retain their intended roll, volume, edge, and symmetry.
Common mistake: Pressing directly over a raised seam, button, or pick stitch can imprint the exterior.
Which Equipment Is Used for Different Garments?
Professional pressing equipment is selected by garment geometry, not simply by fabric name. Utility presses handle broad flat areas, while form finishers and specialty bucks preserve curves, waist shaping, sleeves, and tailored structure.
| Equipment | Typical garment | Main action | Primary limitation |
|---|---|---|---|
| Utility press | Shirt front, skirt, flat trouser panel | Compresses fabric between head and buck | Can flatten three-dimensional tailoring |
| Form finisher | Jacket, coat, dress | Uses steam and air around a body form | Less effective for razor-sharp flat creases |
| Pants topper | Trouser waist and seat | Shapes waistband, seat, and upper rise | Does not finish the full leg |
| Pants legger | Trouser legs | Aligns and presses long leg panels | Misalignment can create double creases |
| Shirt tensioning machine | Laundered button-down shirt | Tensions shirt and dries it with hot air | Designed for shirt production, not bespoke tailoring |
| Puff iron | Sleeve, shoulder, ruffle, gathered detail | Presses curved or narrow sections | Requires skilled manual positioning |
A shirt production machine may finish a laundered shirt in under a minute, depending on garment size, moisture level, and equipment. That speed does not mean every shirt receives the same finish: collars, cuffs, plackets, and pocket areas still require correct tension and inspection.
What Temperature and Steam Settings Are Typical?
Typical head temperatures range from approximately 120-145°C for many synthetics, 150-165°C for wool and silk applications, and 180-205°C for cotton and linen, but these figures are operating references rather than universal prescriptions. The care label, finish, color, lining, and machine calibration control the final setting.
| Material or garment | Typical pressing approach | Approximate temperature reference | Main risk |
|---|---|---|---|
| Polyester or nylon | Short contact, low moisture, protective cover | 120-145°C | Glazing, melting, permanent shine |
| Wool suiting | Moderate steam, shaped buck, vacuum cooling | 150-165°C | Shine, nap flattening, seam impressions |
| Silk | Low pressure, controlled moisture, often hand finishing | 110-150°C depending on silk and label | Water marks, scorching, distortion |
| Cotton shirt | Steam, tension, flat compression | 180-205°C | Yellowing, scorch, unwanted stiffness |
| Linen | Moisture plus firm alignment | 180-205°C | Persistent creases and seam impressions |
| Velvet or corduroy | Usually steam from the reverse or form finishing | Often below direct-face pressing levels | Crushed pile and irreversible shading |
Machine gauges, steam quality, and fabric moisture change the actual result. A boiler reading of 100 psi does not mean a technician should expose every garment to the same steam duration or head temperature.
How Long Does Professional Pressing Take?
A single commercial press cycle commonly takes 5-15 seconds, while machine work for one garment often takes 2-5 minutes. Customer turnaround is usually 24-48 hours because garments are tagged, cleaned or inspected, finished, checked, bagged, and routed through the shop.
| Service | Typical machine labor | Typical customer price | Typical turnaround |
|---|---|---|---|
| Laundered and pressed shirt | 1-3 minutes | $3-$6 | 24-48 hours |
| Trousers or slacks | 2-4 minutes | $7-$12 | 24-48 hours |
| Suit jacket | 2-4 minutes | $8-$15 | 24-48 hours |
| Two-piece suit | 4-8 minutes | $15-$25 | 24-48 hours |
| Press-only garment | 1-5 minutes | 20%-30% below cleaning package | Same day to 48 hours |
These are typical United States retail ranges, not fixed national prices. Urban labor rates, garment complexity, rush handling, stain treatment, hand pressing, and local competition can change the invoice substantially.
Same-day service is common when a shop receives the garment early, often before 9:00 a.m., but availability is location-specific. A hand-pressed bespoke jacket may take longer than a machine-finished shirt even when the garment appears less wrinkled.
Is Professional Pressing Different From Ironing and Steaming?
Professional pressing differs from ironing because pressing compresses fabric vertically and then cools it under vacuum, while ironing generally moves a heated soleplate across the surface. Steaming relaxes wrinkles with little compression, so it is safer for some textures but less effective for sharp creases and structured edges.
| Method | Heat and moisture | Surface action | Best use | Main limitation |
|---|---|---|---|---|
| Professional pressing | Controlled steam and heated surfaces | Vertical compression and vacuum cooling | Suits, trousers, shirts, flat panels | Can create shine or crush structure if misused |
| Professional steaming | Steam with low direct pressure | Fiber relaxation without hard compression | Silk, cashmere, velvet, knits | Cannot create a crisp trouser crease |
| Home ironing | Soleplate heat, optional steam | Sliding contact and manual pressure | Everyday cotton garments | Higher risk of dragging, scorching, and uneven pressure |
| Form finishing | Internal steam and hot air | Three-dimensional shaping | Jackets, coats, dresses | Requires specialized equipment and skill |
The best method depends on the desired finish. A business shirt may need a crisp collar and placket, while velvet needs preserved pile and a cashmere sweater needs minimal compression.
Does Pressing Clean Clothes?
Pressing does not clean clothing. Pressing removes wrinkles, sharpens creases, and restores shape after a garment has already been washed, laundered, dry cleaned, or otherwise cleaned.
Heat can sometimes reduce odor-causing moisture or microorganisms on a surface, but pressing is not a guaranteed sanitizing treatment. It also cannot reliably remove oil, perspiration, food, cosmetics, or embedded soil.
Tell the cleaner about stains before pressing. A visible mark that seems minor can become harder to remove after heat exposure, especially when the stain contains protein, sugar, oil, or dye.
How Should Different Garments Be Pressed?
Garment construction determines the safest pressing method. Flat cotton shirts tolerate more direct compression than lined jackets, while velvet, silk, elastane blends, and coated fabrics often need lower pressure, indirect steam, or hand finishing.
Shirts
Commercial shirt finishing uses tension, steam, and broad compression to smooth the body, sleeves, collar, cuffs, and placket. Starch is optional, not automatic.
Light starch can increase body and crease retention, but repeated heavy starch may leave residue and make a shirt feel brittle. Request light starch or no starch for fine cotton, dark colors, and shirts worn frequently.
Trousers
Trouser pressing begins with alignment at the waistband, rise, inseam, and outseam. The legger then establishes a crease along the intended leg line, often using vacuum to keep the fabric from shifting.
A crease should follow the trouser’s construction and original design. Creating a second crease beside a seam can permanently alter the appearance, particularly on wool trousers.
Suit Jackets and Coats
Jackets and coats usually benefit from a form finisher, careful steaming, or hand pressing rather than aggressive flat compression. The operator must preserve the lapel roll, shoulder expression, sleeve head, chest canvas, lining, and pocket shape.
Hard pressing can flatten a natural roll or expose a glossy area on dark wool. Tailored garments with handwork, fused interlinings, horn buttons, or delicate pick stitching should be identified at intake.
Silk, Velvet, and Knits
Silk requires controlled moisture because uneven water contact can produce rings or color changes. Velvet and corduroy require pile protection, often with steaming from the reverse side or support that prevents the surface from being crushed.
Knits should generally be reshaped while damp or steamed lightly, then dried flat or on a suitable hanger. Strong compression can stretch a knit, flatten its loft, or create an outline from the buck cover.
What Causes Pressing Problems?
Most pressing defects result from incorrect alignment, excessive heat, excessive pressure, contaminated padding, or inadequate cooling. The visible problem often appears after the garment leaves the machine, so prevention at setup is more reliable than repair afterward.
| Problem | Likely cause | Immediate response | Prevention |
|---|---|---|---|
| Shiny patch | Pressure and heat flattened the surface | Re-steam lightly and brush nap if recoverable | Use a cover, lower pressure, and indirect contact |
| Double trouser crease | Leg panels were misaligned | Re-wet or steam, realign, and repress | Match seams and original crease first |
| Water mark | Uneven steam or condensation | Stop heat and assess colorfastness | Use dry, clean steam and adequate vacuum |
| Damp odor | Vacuum did not remove moisture | Hang in ventilated space, then recheck | Extend vacuum and cool fully |
| Flattened lapel | Rigid compression crushed tailoring | Use form finishing or hand steam | Avoid hard utility-press contact |
| Imprinted button or seam | Trim was trapped under the head | Reposition and hand finish | Use a button cushion or press from the reverse |
A shine mark is not always scorch damage. Wool can develop a temporary glossy appearance when surface fibers are compressed, but synthetic fibers may melt or thermally glaze, making the defect permanent. A professional should distinguish the two before attempting recovery.
Moisture spots also have multiple causes. Uneven steam distribution, mineral deposits, dirty padding, and condensation can all mark fabric. A weak vacuum is only one possible cause.
When Should You Choose Pressing, Steaming, or Cleaning?
Choose professional pressing when a clean garment needs a defined, smooth finish, especially for shirts, trousers, uniforms, and structured formalwear. Choose steaming when preserving texture and volume matters more than creating sharp edges, and choose cleaning when soil, odor, or stains are the actual problem.
Use this decision sequence:
- Is the garment dirty or stained? Choose laundering, dry cleaning, or stain treatment before pressing.
- Does the garment need a sharp crease or flat panel? Choose pressing.
- Does the garment have pile, loft, or delicate drape? Choose steaming or form finishing.
- Does the garment contain fused or structured tailoring? Request hand pressing or form finishing.
- Does the care label restrict heat or moisture? Follow the label and disclose the fabric to the cleaner.
Press-only service is efficient between full cleanings for suits that have been worn lightly. It cannot substitute for cleaning when perspiration, skin oils, smoke, food, or environmental soil has accumulated.
How Can Customers Get a Better Pressed Finish?
Customers improve the result by giving the cleaner accurate garment information and collecting clothing only after it has cooled and dried. Tell the shop about stains, previous shine, alterations, unusual trims, waterproof coatings, and any preferred crease or starch level.
Use this preparation checklist:
- Empty pockets and remove detachable accessories.
- Point out stains before the garment enters production.
- State whether the garment needs no starch, light starch, or a firmer finish.
- Request hand pressing for bespoke jackets, velvet, heavily structured coats, or valuable vintage clothing.
- Photograph existing damage if the garment is expensive or already shiny.
- Collect garments on time and remove plastic covers during home storage if condensation may form.
- Hang jackets and trousers on shaped hangers, then allow them to rest before wearing.
A suit generally benefits from airing after wear rather than pressing after every use. A practical rule is to alternate wears and request pressing after roughly 3-4 light wears, while cleaning only when soil or odor requires it.
What Is Professional Pressing Not Good For?
Professional pressing is not a cure for permanent fiber damage, stretched fabric, severe pilling, deep oil stains, adhesive failure, or incorrectly altered clothing. Heat and pressure can improve appearance, but they cannot restore a melted synthetic fiber or rebuild a delaminated jacket canvas.
Pressing is also a poor substitute for tailoring. If a trouser leg twists because the garment was cut or altered incorrectly, a sharp crease may temporarily disguise the problem but will not correct the underlying grain or seam position.
The Bottom Line
Professional clothes pressing works by combining controlled heat, moisture, vertical pressure, garment alignment, and vacuum cooling. The best result comes from matching the equipment and contact method to the garment’s construction: utility presses suit flat shirts and trousers, while form finishers and hand tools protect jackets, coats, velvet, silk, and tailored details.
For a clean work shirt, commercial pressing delivers a sharper finish than ordinary ironing. For a valuable suit, ask how the cleaner will protect the lapel, canvas, lining, buttons, and trouser crease before choosing a press-only service. Understanding how does professional clothes pressing work helps you request the correct finish instead of simply asking for more heat or starch.
Frequently Asked Questions
Can Professional Pressing Remove Wrinkles From a Suit?
Professional pressing can remove ordinary wear wrinkles from a suit and restore the jacket’s lapel, sleeve, and body shape. Pressing cannot repair melted fibers, severe shine, adhesive separation, or an incorrectly altered garment. A form finisher or hand press is generally safer than hard flat compression for structured jackets.
Is Pressing Safe for Wool?
Pressing can be safe for wool when the operator controls heat, steam, pressure, and cooling. Wool suiting is vulnerable to shine and nap flattening, especially under excessive direct pressure. A clean protective cover, a shaped buck, and vacuum cooling reduce risk, while velvet-finished or delicate wool may require hand finishing.
Should I Request Starch With Shirt Pressing?
Request starch only when you want additional body and sharper creases. Light starch is a practical choice for uniforms and formal shirts, while no starch better suits fine cotton, dark shirts, and garments washed frequently. Heavy repeated starch can leave residue and make fibers feel stiff or brittle.
Can a Pressed Garment Go Straight Into a Plastic Bag?
A pressed garment should be cool and dry before long-term storage in a plastic cover. Short transport in a breathable cleaner’s bag is normal, but trapped moisture can create odor or encourage mildew in dense fabrics. At home, use a shaped hanger and allow the garment to air before closet storage.
Why Do Pressed Clothes Wrinkle Again So Quickly?
Pressed clothes wrinkle quickly when residual moisture remains, the garment was worn before cooling, fibers are naturally low-resilience, or the clothing is stored tightly. Humidity also relaxes many fibers. Proper vacuum cooling, complete drying, correct hanger support, and adequate space in the closet improve crease retention.


