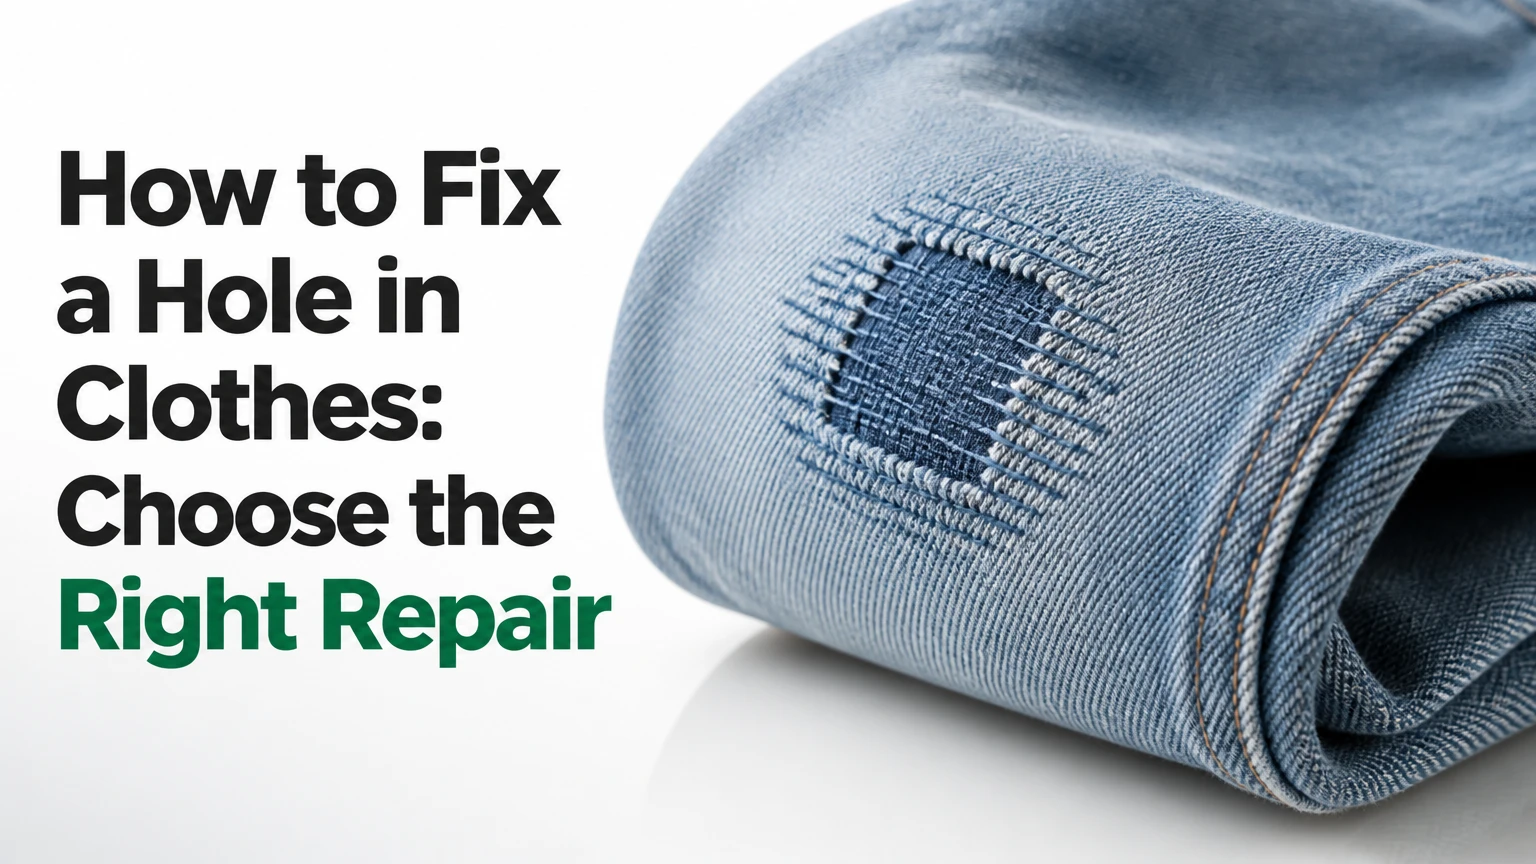
To fix a hole in clothes, match the repair to the fabric, hole size, location, and desired finish. Use a ladder stitch for an open seam, darning for knitwear, a sewn or iron-on patch for larger woven-fabric holes, and professional reweaving for valuable wool, silk, or tailored garments. Most small repairs take 5-40 minutes.
Key facts at a glance
- A hole under 5 mm in stable woven fabric usually needs a hand stitch rather than a patch.
- Darning preserves stretch in socks and sweaters better than a rigid adhesive patch.
- A patch should extend at least 1.5 cm beyond a hole on every side.
- Iron-on adhesive is unsuitable for heat-sensitive nylon, untreated silk, leather, and many waterproof coatings.
- A split seam is repaired differently from missing fabric because the original edges can still be joined.
- Professional invisible reweaving is the safest choice for cashmere, tailored wool, silk, and high-value clothing.
How Do You Choose a Hole Repair Method?
Choose a repair method by identifying whether fabric is missing, the edges are separated, or the surrounding material is thinning. A seam opening needs a ladder or backstitch; a knit hole needs darning; a missing section in denim or cotton needs a patch; and a moth hole in a fine suit may need reweaving.
Inspect the garment under bright light before cutting anything. Check the fiber label, stretch the fabric gently in both directions, and examine whether the hole is growing. A clean circular hole often indicates abrasion or insect damage, while a jagged opening with loose threads usually indicates tearing.
Quick method selector
| Damage and material | Best method | Typical time | Typical home-material cost |
|---|---|---|---|
| Open side seam, cotton shirt | Ladder stitch | 5-15 minutes | $0.10-$1 |
| 2-20 mm hole, wool sock | Darning | 15-35 minutes | $1-$4 |
| 1-5 cm hole, denim jeans | Sewn patch or visible mending | 20-60 minutes | $1-$8 |
| Small tear, nylon jacket | Compatible repair tape or sewn patch | 5-25 minutes | $3-$12 |
| Moth hole, cashmere sweater | Professional reweaving | 1-3 weeks | $25-$150 |
| Hole in silk or tailored suit | Specialist hand repair | 1-3 weeks | $30-$200 |
The most important decision is not thread color. It is whether the surrounding fabric can carry tension. Thin, worn fabric may require a larger backing patch even when the visible hole is small.
What Tools and Materials Do You Need?
A basic clothing repair requires a sharp needle, compatible thread, small fabric scissors, pins, and a rounded support such as a darning mushroom or jar lid. Add a matching scrap fabric, fusible web, pressing cloth, embroidery thread, or repair tape according to the chosen technique.
Before you start
| Requirement | Typical specification | Why it matters |
|---|---|---|
| Hand needle | Sharp size 8-10 for woven fabric | Pierces cotton, denim, and canvas cleanly |
| Tapestry needle | Blunt size 18-22 | Passes through knit loops without splitting yarn |
| Thread | Polyester all-purpose, 40-50 weight | Handles routine washing and moderate tension |
| Darning yarn | Similar fiber and thickness | Preserves knit flexibility and surface texture |
| Patch fabric | Prewashed cotton, denim, or compatible shell fabric | Reduces later shrinkage and distortion |
| Fusible web | Double-sided, garment-rated | Bonds a patch to stable fabric |
| Iron setting | Label-approved temperature | Prevents melting or scorching |
| Support | Darning egg, mushroom, or smooth cup | Keeps the repair area gently tensioned |
Wash and dry the garment according to its normal care instructions before repairing it, unless the damage is an emergency. Prewashing prevents a cotton patch from shrinking later and pulling the surrounding garment into puckers.
How to Fix a Hole in Clothes by Hand
The general hand-repair process has six stages: stabilize the garment, clean loose fibers, choose matching materials, anchor beyond the damaged area, close or cover the opening, and test the repair gently. The repair succeeds when the fabric lies flat, the stitches do not cut into the cloth, and the opening no longer expands under light tension.
Step 1: Inspect and stabilize the damage
Turn the garment inside out and place it flat. Measure the opening at its widest point, then place a small piece of removable fabric tape around the outside if the edges are fraying.
Do not pull loose threads out. Trim only long, dangling fibers with scissors, leaving short fibers that can help anchor stitches. If the hole is in a seam, open the garment enough to expose the seam allowance rather than sewing through several unrelated layers.
Success checkpoint: The damaged area remains flat and the hole does not enlarge when the fabric is moved gently.
Common mistake: Cutting the hole into a neat circle removes usable fabric and often makes the repair larger.
Step 2: Match the needle and thread
Select a thread close to the fabric’s fiber and weight. Use polyester thread for most washable cotton, denim, and synthetic clothing; use wool or cotton yarn for knitted garments when softness and stretch matter.
Use a shorter thread length, about 45-60 cm, to reduce tangling. For delicate silk or fine wool, choose a fine thread and a sharp needle that leaves the smallest possible puncture.
Success checkpoint: The needle passes through the fabric without forcing or visibly enlarging the holes.
Common mistake: Heavy embroidery floss on lightweight fabric creates ridges and concentrates stress at each stitch.
Step 3: Close a small split with a ladder stitch
Use a ladder stitch when the original fabric edges meet, especially along a seam or the opening of a plush or lined garment. Knot the thread inside the garment, take a tiny horizontal stitch on one edge, then take an equal stitch on the opposite edge and alternate until the opening is closed.
Pull the thread every 2-3 stitches, using only enough tension to bring the edges together. Finish with two small knots in the seam allowance and bury the thread tail between fabric layers.
Success checkpoint: The seam closes without a ridge, and the stitching becomes difficult to see from the outside.
Common mistake: Pulling every stitch tight immediately causes puckering. Let the thread form a loose ladder until several stitches are in place.
Step 4: Darn a hole in knitwear or socks
Darning replaces missing knit structure with interlaced threads. Place a smooth support inside the garment, thread a tapestry needle, and make parallel stitches across the hole, extending 5-10 mm into healthy fabric on each side.
Turn the work 90 degrees and weave perpendicular rows over and under the first set. Keep the tension similar to nearby knit loops. For a 1 cm sock hole, use approximately 20-30 vertical passes and 15-25 horizontal passes, depending on yarn thickness.
Success checkpoint: The new woven area flexes with the surrounding knit instead of forming a stiff disk.
Common mistake: Pulling the darning yarn tight shrinks the hole and creates a raised, uncomfortable patch. Leave enough slack for the garment’s normal stretch.
Step 5: Sew a fabric patch over a larger hole
Use a patch when fabric is missing or the surrounding area is too weak for isolated stitches. Cut a prewashed patch with rounded corners, extending at least 1.5 cm beyond the opening in every direction; increase the margin to 2.5 cm for high-stress knees, elbows, and seat areas.
Place the patch behind the hole for a subtle repair or on top for visible mending. Secure the patch with pins or temporary basting, then sew around its perimeter using a whip stitch, blanket stitch, zigzag stitch, or a short machine zigzag.
Success checkpoint: The patch lies flat and the edge remains attached when the garment is stretched gently in both directions.
Common mistake: Square corners lift first. Rounded corners distribute stress and remain attached through repeated washing.
Step 6: Reinforce and test the repair
Inspect the reverse side for exposed knots, thread loops, and sharp needle ends. Add a second line of stitching if the garment receives repeated stress, keeping the reinforcement 2-3 mm outside the first line.
Stretch the fabric as it would move during wear. For jeans, bend the knee; for a shirt, rotate the sleeve; for knitwear, stretch the repaired section lightly. Wash the garment according to its care label before judging the final appearance.
Success checkpoint: The repaired area remains flexible, secure, and free of new tears after movement.
Common mistake: Testing by pulling hard on the hole can damage a sound repair. Use normal garment movement instead.
Which Repair Method Works Best for Each Fabric?
The best repair method depends on the fabric’s structure and heat tolerance. Denim and canvas accept sewn patches, wool knits respond well to darning, jersey needs stretch-compatible stitching, and technical shells require a compatible repair tape or specialist patch.
| Fabric or garment | Preferred repair | Avoid | Reason |
|---|---|---|---|
| Denim jeans | Cotton or denim patch with zigzag stitching | Thin thread alone on a large hole | Denim holes often have weakened fabric beyond the visible opening |
| T-shirt jersey | Stretch stitch, darning, or soft patch | Tight straight stitches | Rigid stitches snap when jersey stretches |
| Wool sweater | Matching wool darning yarn | High heat and standard iron-on web | Heat and stiffness can distort wool fibers |
| Cotton shirt | Ladder stitch for seams, patch for missing fabric | Oversized heavy patch | Light cotton can sag around a rigid repair |
| Polyester jacket | Low-temperature compatible patch or repair tape | Direct high heat | Synthetic fibers can melt, shine, or shrink |
| Nylon outdoor shell | Manufacturer-approved repair tape | Ordinary fusible web | Adhesive and heat can damage coatings and waterproofing |
| Silk blouse | Fine hand stitching or professional repair | Iron-on patch and coarse thread | Silk punctures easily and shows adhesive marks |
| Leather or suede | Leather specialist | Needle-and-thread home repair | Needle holes are permanent and cannot close like woven fibers |
Jersey and ribbed knitwear deserve special care because their loops move in several directions. A woven patch can work behind a jersey hole, but the patch should be soft and the perimeter should use a narrow zigzag or small hand stitches rather than a rigid straight line.
Is Sewing or an Iron-On Patch More Durable?
Sewn patches generally outlast iron-on patches on high-stress clothing because stitches remain mechanically attached after adhesive softens or ages. Iron-on patches are faster and useful for stable, washable fabrics, but they can peel, stiffen the area, or fail when the garment flexes repeatedly.
| Repair type | Application time | Typical durability | Flexibility | Best use |
|---|---|---|---|---|
| Hand-sewn patch | 20-60 minutes | 1-5 years with care | High | Jeans, cotton, workwear |
| Machine-sewn patch | 5-15 minutes | 2-8 years with care | Medium-high | Uniforms, denim, canvas |
| Iron-on patch | 5-10 minutes | 3-30 washes, typical | Low-medium | Stable casual garments |
| Fusible web plus sewn edge | 10-25 minutes | 20-60 washes, typical | Medium | Neat reinforcement |
| Repair tape | 5-10 minutes | 10-50 washes, product-dependent | Medium | Nylon jackets and outdoor gear |
| Decorative appliqué | 15-45 minutes | 1-5 years with stitching | Medium | Children’s clothing and visible repairs |
The wash count for adhesive products varies substantially with detergent, dryer heat, fabric movement, and application pressure. Treat manufacturer instructions as the controlling specification, and sew around an iron-on patch when the garment experiences kneeling, stretching, or frequent laundering.
How Do You Apply an Iron-On Patch Safely?
Apply an iron-on patch by testing heat on an inconspicuous area, placing the adhesive correctly, covering it with a pressing cloth, and holding the iron still for the manufacturer’s stated time. Never assume that “hot” is safe for polyester, nylon, elastane, coated fabric, or wool.
- Trim loose fibers without cutting healthy fabric.
- Cut the patch at least 1.5 cm larger than the hole on every side.
- Put the garment on a firm, heat-safe surface.
- Place the adhesive side against the garment, following the product’s orientation.
- Cover the patch with a cotton pressing cloth.
- Press without sliding for 10-15 seconds, or follow the package directions.
- Let the area cool flat for 5 minutes.
- Check the perimeter and sew around it if the edge lifts.
Success checkpoint: The patch is fully bonded, with no glossy melted fibers, bubbling, or loose corners.
Common mistake: Moving the iron back and forth can shift the patch and spread adhesive beyond its edge. Lift and reposition the iron instead.
Iron-on adhesive is a poor choice for a hole near a pocket opening, crotch, elbow, or knee unless the patch also receives stitches. Adhesive repairs work best where the fabric stays relatively flat and the repair does not carry repeated tensile load.
When Should You Use Visible Mending or Sashiko?
Use visible mending when appearance can be decorative and the garment needs reinforcement over a wider worn area. Sashiko traditionally uses repeated running stitches, often in geometric patterns, while contemporary visible mending may combine contrasting thread, appliqué, embroidery, and fabric patches.
For denim, place a patch behind the hole and use evenly spaced stitches across the damaged region. A practical beginner spacing is 3-5 mm between running stitches, with the pattern extending 1-2 cm beyond the visibly weak fabric.
Visible mending is strong because it distributes force across a broad area. It is unsuitable when a uniform, hidden finish is required, and thick decorative thread can feel uncomfortable inside a sleeve or waistband.
Appliqué as an alternative
Appliqué covers a hole with a shaped motif such as a leaf, star, animal, or badge. Fuse the motif temporarily if the fabric permits, then stitch its entire perimeter; adhesive alone is rarely enough for a frequently washed garment.
Can You Repair a Hole Without Sewing?
You can repair a small hole without sewing by using iron-on fabric, fusible web, garment repair tape, or liquid fabric adhesive, but the result is usually less flexible and less durable than stitching. No-sew repairs work best on stable cotton, denim, and compatible outerwear materials.
| No-sew option | Best material | Typical set time | Main limitation |
|---|---|---|---|
| Iron-on fabric patch | Cotton and denim | 5-10 minutes | Heat and stiffness |
| Fusible web with backing fabric | Stable woven fabric | 10-15 minutes | Requires careful pressing |
| Outdoor repair tape | Nylon and polyester shells | 5 minutes | Visible glossy or matte film |
| Liquid fabric glue | Decorative, low-stress areas | 12-24 hours | May form a hard or shiny edge |
| Temporary fabric tape | Emergency garment repair | 1-5 minutes | Often fails in washing |
Do not use household superglue. Cyanoacrylate adhesives become brittle, can stain fabric, and may bond skin instantly. A no-sew repair should be treated as temporary when the hole sits in a seam, stretch zone, or load-bearing area.
What Are the Common Repair Failures?
Most failed clothing repairs result from mismatched tension, insufficient overlap, unsuitable heat, or stitching into already weakened fabric. Correcting the cause works better than adding more thread or adhesive over a failed repair.
| Failure | Likely cause | Recovery |
|---|---|---|
| Fabric puckers | Stitches pulled too tightly | Remove the tight section and restitch with looser tension |
| Patch peels | Inadequate heat, pressure, or cleaning | Repress if allowed, then sew the perimeter |
| New hole beside repair | Stitching entered weak fabric | Move the stitch line 5-10 mm outward and add backing |
| Synthetic fabric shines | Iron temperature too high | Stop heating; replace damaged section if fibers melted |
| Darning feels hard | Dense yarn or excessive tension | Remove several rows and use finer, looser yarn |
| Threads keep fraying | Raw edges left unsupported | Add a patch or blanket stitch around stable fabric |
| Repair shows through | Patch or thread is too heavy | Use finer material and a larger, softer transition |
A counterintuitive rule applies to worn garments: the visible hole is often smaller than the actual damaged zone. Hold the fabric against light and test it gently; if surrounding cloth looks translucent or tears with minimal pressure, reinforce beyond the apparent edge.
What Should You Do for Special Situations?
Special situations need method changes because the garment’s construction, fiber, or value changes the risk. Repair a seam opening differently from a moth hole, use elastic-compatible stitches for stretch clothing, and avoid home ironing on luxury or coated materials.
A hole in jeans
Turn jeans inside out and place a denim or cotton patch behind the hole. Sew a dense zigzag over the opening, then add parallel rows across the worn area; a patch extending 2-3 cm beyond the hole usually handles knee and thigh movement better than a narrow repair.
A hole in a T-shirt
Use fine polyester thread and a narrow zigzag, stretch stitch, or soft knit patch. Avoid pulling the jersey edges together tightly, because the repair will pucker when the shirt returns to its normal shape.
A moth hole in wool
Confirm that the damage is inactive by checking nearby seams, cuffs, and stored garments for additional holes or larvae. Wash or dry-clean according to the care label, isolate the garment, and use matching-yarn darning for a casual sweater; send cashmere, fine merino, or tailored wool to a reweaver.
A hole in a puffer or rain jacket
Cover a clean tear with manufacturer-approved nylon or polyester repair tape. Keep the tape’s corners rounded, press firmly, and do not use an iron unless the garment and tape instructions explicitly permit heat.
A hole near a zipper or pocket
Remove or loosen the relevant seam where possible, reinforce the reverse side, and stitch into the seam allowance. A surface patch alone may interfere with the zipper slider or cause the pocket bag to detach.
How Much Does It Cost and How Long Does It Take?
A home repair typically costs $0.10-$12 in materials and takes 5-60 minutes, while specialist reweaving commonly costs $25-$200 and takes 1-3 weeks. The price depends on fabric value, hole size, location, color matching, lining, and whether the repair must be invisible.
| Repair scenario | Home time | Home cost | Professional cost |
|---|---|---|---|
| 5 mm seam opening | 5-10 minutes | $0.10-$1 | $10-$25 |
| 1 cm sock or sweater hole | 15-35 minutes | $1-$4 | $15-$40 |
| 3 cm denim hole | 25-60 minutes | $2-$8 | $20-$60 |
| Nylon shell tear | 5-20 minutes | $3-$12 | $20-$75 |
| Cashmere moth hole | 30-90 minutes at home | $1-$5 | $40-$150 |
| Tailored suit or silk hole | 30-120 minutes at home | $1-$8 | $50-$200 |
The environmental value of repair comes from continued use, not from the repair label itself. Orsola de Castro, co-founder of Fashion Revolution, is widely quoted as saying, “The most sustainable item is the one you already own.” That principle has a practical limit: a poor repair that causes discomfort or rapid replacement does not extend a garment’s useful life.
When Should You Hire a Professional?
Hire a professional when the hole affects a tailored seam, lining, silk, cashmere, leather, waterproof coating, or a high-value garment. Professional reweaving can match individual warp and weft threads, while a home patch may remain visible, stiff, or structurally weak.
Choose a specialist with experience in the relevant material rather than a general alteration service. Ask whether the proposed repair is reweaving, patching, darning, or seam reconstruction, because those services produce different visual and durability results.
Do not attempt invisible reweaving on a garment you cannot risk damaging. It requires matching thread direction, density, color, and tension across a very small area, and failed attempts may enlarge the opening.
How Do You Care for Repaired Clothes?
Care for repaired clothing by washing it inside out, using the lowest effective agitation, and avoiding unnecessary high-heat drying. Hand-wash or air-dry delicate darning, and inspect adhesive patches after the first wash rather than waiting for the repair to fail completely.
Follow these care rules:
- Use a mesh laundry bag for socks, knitwear, and small repaired garments.
- Fasten zippers and hooks before washing to prevent snagging.
- Avoid chlorine bleach on repaired colored fabric and most elastic fibers.
- Air-dry iron-on repairs when possible.
- Press adhesive patches again only when the product instructions permit it.
- Repair thinning fabric before a second hole appears.
- Store wool clean and dry in sealed containers after treating any active moth problem.
The best repair is the one that matches expected movement. A decorative stitch pattern may last years on a denim jacket but fail quickly on a stretchy waistband unless the underlying patch and thread can move with the garment.
Frequently Asked Questions
Can I fix a hole with regular thread?
Regular all-purpose polyester thread works for most cotton, denim, polyester, and canvas repairs when its weight matches the fabric. Use wool yarn for knitted wool, fine silk or polyester thread for silk, and a heavier thread only when the surrounding fabric can support it without puckering.
Should I cut away the frayed edges?
Do not cut away every frayed edge. Trim long loose fibers, but preserve short fibers that can be secured by stitches or covered by a patch; removing healthy material can enlarge the opening and make the repair more visible.
How do I fix a hole that keeps getting bigger?
Stop the enlargement by reinforcing healthy fabric 5-10 mm beyond the visible hole. Add a backing patch for worn areas, then use darning, zigzag stitching, or a perimeter stitch that distributes tension instead of concentrating it at the original edge.
Can fabric glue replace sewing?
Fabric glue can replace sewing for low-stress decorative repairs and some stable patches, but it is less reliable at seams, knees, elbows, waistbands, and stretchy areas. Allow the adhesive to cure fully, follow its wash instructions, and add stitches when durability matters.
How do I repair a hole without making it visible?
Use fine matching thread, a compatible needle, and small stitches that follow the fabric’s weave or knit direction. For valuable wool, silk, suits, and cashmere, professional reweaving gives a better chance of a hidden result than a home patch or iron-on adhesive.
Is it better to patch a hole from the inside or outside?
Place the patch inside for a discreet repair and outside when maximum coverage or a decorative finish matters. A hidden patch still needs stitching or appropriate adhesive around its full perimeter, especially when the surrounding fabric is worn rather than cleanly torn.
The Bottom Line
To fix a hole in clothes, first identify the fabric structure and whether material is missing. Use ladder stitching for open seams, darning for knitwear, a sewn patch for larger woven holes, visible mending for decorative reinforcement, and specialist reweaving for valuable fine garments. Match thread weight, maintain gentle tension, extend patches beyond weak fabric, and test heat before using adhesive. With the correct method, repairing a hole in clothes can take 5-40 minutes and preserve the garment for years.


