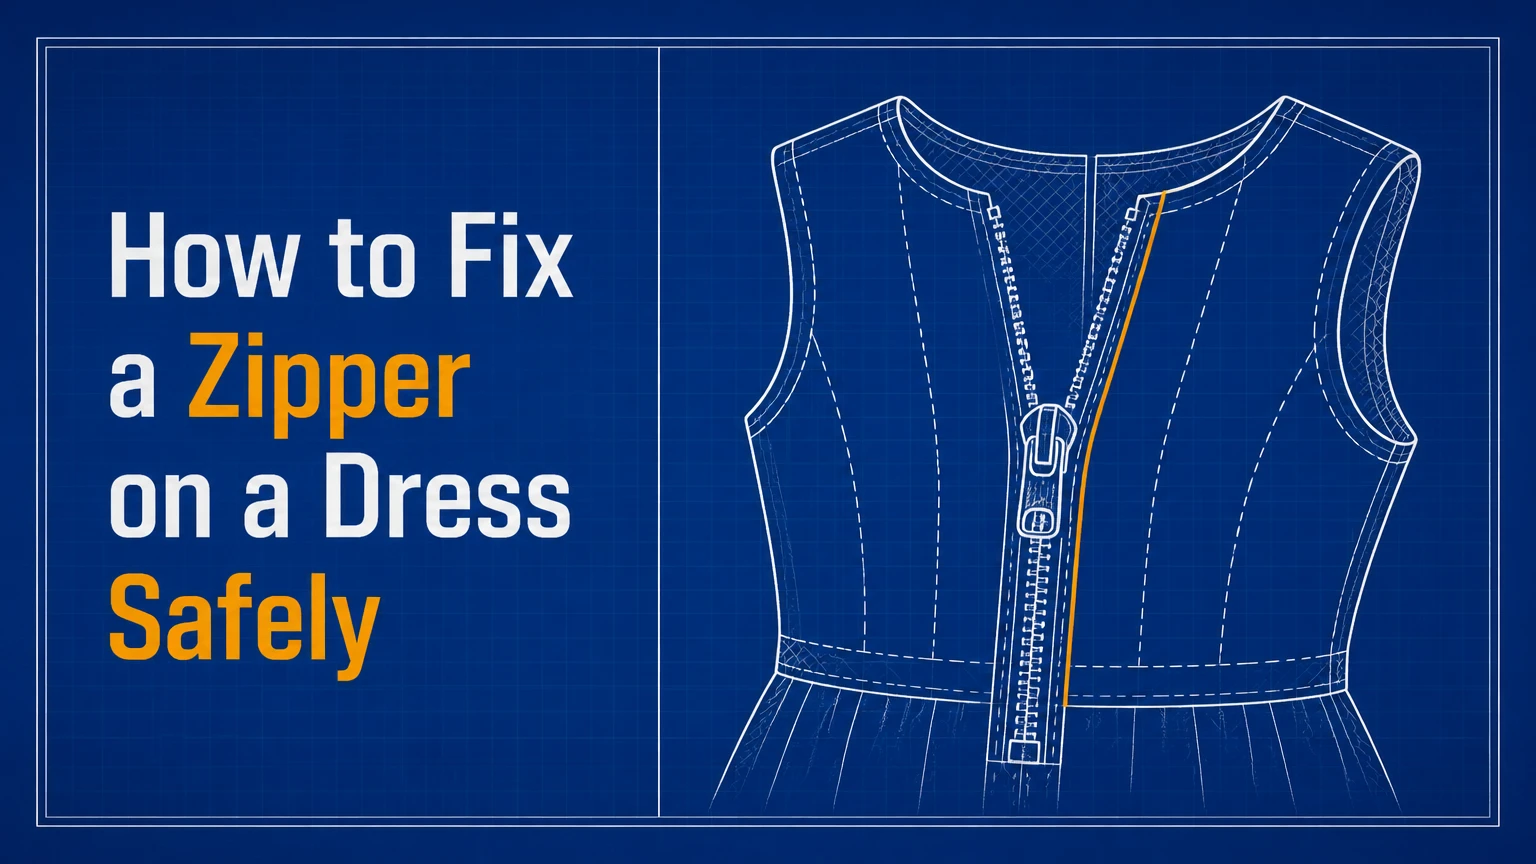
To fix a zipper on a dress, first identify whether the problem is a snagged slider, a loose slider, damaged teeth, a broken pull, or a detached slider. Most stuck or separating zippers can be repaired in 2-10 minutes with soap, a pencil, or needle-nose pliers, while missing middle teeth usually require zipper replacement. The fabric type determines how much force is safe.
Key Facts at a Glance
- A dress zipper that separates behind the slider usually has a worn or widened slider, not automatically a defective zipper tape.
- A stuck slider should move backward before it moves forward, because forward force usually tightens the fabric caught inside.
- A missing tooth near the end can sometimes be isolated with a heavy thread stop, but a missing middle tooth normally requires zipper replacement.
- An invisible zipper needs an invisible-zipper foot or a method that opens the coil while stitching.
- Typical home repairs take 2-10 minutes; replacing a sewn-in dress zipper takes about 45-90 minutes.
- Silk, chiffon, satin, lace, stretch knits, lined gowns, and expensive garments are safer with a tailor when the seam or teeth are damaged.
How a Dress Zipper Works
A dress zipper joins two fabric edges through a slider that interlocks or separates rows of teeth or nylon coil. The zipper tape is sewn into the dress, the slider contains the moving channel, and the pull tab provides leverage for opening and closing.
Most dress zippers are non-separating zippers, meaning a fixed bottom stop keeps both sides attached. Jackets commonly use separating zippers with an insertion pin and retaining box, but those parts are not present on most back or side dress zippers.
What Are the Main Zipper Parts?
| Part | Physical location | Repair relevance |
|---|---|---|
| Tape | Fabric strip beside each tooth row | Torn tape can require full replacement |
| Teeth or coil | Interlocking track on both sides | One missing middle tooth usually prevents reliable repair |
| Slider | Moving metal or plastic body | Widening causes the zipper to split |
| Pull tab | Handle attached to slider | Can be replaced temporarily with a paperclip |
| Top stop | Barrier at the upper end | Prevents the slider from leaving the track |
| Bottom stop | Barrier at the lower end | Keeps a non-separating slider on the zipper |
Inside the slider, a narrow Y-shaped channel guides the two rows together at the front and apart at the rear. If the channel becomes too wide, the teeth pass through without locking. If fabric or thread enters the channel, the slider can jam and pull the dress seam out of shape.
Which Zipper Is on Your Dress?
Identify the zipper before choosing a repair method, because invisible coils, molded teeth, and metal teeth tolerate different handling. An invisible zipper has a coil on the reverse side and a narrow slider, while a conventional coil zipper exposes the teeth or coil beside the tape.
| Zipper type | How to identify it | Common dress use | Repair consideration |
|---|---|---|---|
| Invisible coil | Coil hidden on the underside | Formal, bridal, cocktail dresses | Needs precise alignment and an invisible foot for replacement |
| Nylon coil | Flexible visible coil | Cotton and lightweight casual dresses | Slider replacement is often practical |
| Metal tooth | Separate metal teeth | Denim or structured dresses | Bent teeth may be realigned carefully |
| Molded plastic | Large molded teeth | Heavy casual or utility dresses | Cracked teeth usually mean replacement |
| Separating zipper | Insertion pin and retaining box | Rare on dresses, common on jackets | Reinstallation requires correct pin and box alignment |
Check the zipper size before buying a replacement slider. A number such as 3, 5, or 7 generally refers to the approximate closed width in millimeters, but manufacturers vary, so match the replacement to the old slider and zipper type rather than relying on the number alone.
Before You Start
A minor dress zipper repair usually needs 5-10 minutes, costs nothing if household tools are available, and requires only a pencil, mild bar soap, tweezers, and small needle-nose pliers. Full replacement typically costs $5-$20 for materials and takes 45-90 minutes, excluding time spent unpicking lining and matching thread.
Tools and Materials
| Repair | Tools needed | Typical quantity or cost | Skill level |
|---|---|---|---|
| Stuck slider | Tweezers, pencil, bar soap | 1 each, $0-$5 | Beginner |
| Separating teeth | Needle-nose pliers, soap | 1 pair, $5-$15 | Beginner |
| Broken pull | Paperclip or replacement pull | 1, $0-$8 | Beginner |
| Thread stop | Heavy polyester thread, needle | 30-45 centimeters, $2-$5 | Beginner |
| Full replacement | Matching zipper, seam ripper, zipper foot, thread | 1 zipper, $5-$20 | Intermediate |
Lay the dress flat under bright light. Unzip it fully if possible, remove jewelry that can snag the fabric, and inspect both sides of the zipper tape. Do not test a repair while wearing the dress, because body tension can pull the slider diagonally and disguise an alignment problem.
How to Fix a Zipper on a Dress: Step-by-Step
The safest repair sequence is diagnosis, gentle release, lubrication, controlled slider adjustment, and replacement only when the track itself is damaged. Work with the dress flat and support the fabric on both sides of the slider throughout the process.
Step 1: Diagnose the Failure
Move the slider only a few millimeters and observe where the problem starts. If fabric is inside the slider, release the snag; if the slider moves but the closed track opens behind it, inspect the slider; if a tooth is missing or the tape is torn, plan for a replacement.
You will know the diagnosis is useful when the failure can be assigned to one component: fabric, slider, pull tab, tooth, stop, or seam. The common mistake is squeezing the slider before checking for trapped fabric, which can crush both the material and the slider.
Step 2: Release a Slider Caught in Fabric
Hold the dress fabric immediately below the slider and pull it gently away from the teeth. Move the slider backward, in the direction it came from, using short movements while easing the fabric out with tweezers.
If friction remains, rub graphite from a sharpened pencil or a small amount of dry bar soap along the accessible teeth. Avoid oil, cooking grease, petroleum jelly, and liquid lubricants because they can stain silk, satin, polyester lining, and dry-clean-only garments.
You will know the snag is released when the slider moves without lifting the seam or producing a new fold. The common mistake is pulling the tab forward, which drives the trapped fabric deeper into the slider channel.
Step 3: Lubricate and Realign the Track
Apply a thin film of pencil graphite or plain wax to 5-8 centimeters of zipper track around the problem area. Close and open the slider slowly two or three times, keeping both tape edges parallel and removing excess residue with a dry cloth.
For a bent metal tooth, use fine pliers to nudge the tooth back into line by less than 1 millimeter at a time. Do not attempt to straighten nylon coil or molded plastic teeth with heat, because heat can deform the coil, melt nearby fibers, or create a permanent bulge.
You will know alignment is improved when the slider crosses the area without a click, snag, or sideways tilt. The common mistake is lubricating a misaligned track without correcting the tooth, which temporarily masks the obstruction.
Step 4: Tighten a Slider That Keeps Separating
Move the slider to the bottom stop, then place needle-nose pliers on one side of the slider body near the rear opening. Apply one light squeeze, repeat on the opposite side, and test the zipper before applying more pressure.
A zipper that opens behind the slider usually has a slider channel that no longer presses the teeth together closely enough. The adjustment must be tiny, because excessive force can crack a cast-metal slider, jam a plastic slider, or make the zipper impossible to move.
You will know the adjustment worked when the zipper closes smoothly and remains interlocked after five complete open-and-close cycles. The common mistake is squeezing the front nose of the slider, which can distort the channel that guides the teeth.
When Should You Stop Using Pliers?
Stop after one or two small adjustments if the slider remains tight, the teeth still separate, or the slider casing shows a crack. Replace the slider when the zipper tape and teeth are intact but the body is worn; replace the entire zipper when teeth, tape, or stops are damaged.
Pliers are a short-term mechanical correction, not a universal repair. Repeatedly bending the same metal slider fatigues the casing, so a dress worn often may need a new slider even when the plier fix appears successful.
Step 5: Repair a Missing End Tooth
A missing tooth at the extreme top or bottom can sometimes be isolated if the slider does not need to pass over the gap. Remove the slider if necessary, then sew a dense barrier of heavy polyester thread immediately above the damaged area, wrapping the thread 5-6 times and securing it with several small stitches.
The new thread barrier acts as a stop, preventing the slider from entering the damaged section. This workaround is suitable only when the missing tooth is at the terminal end and the remaining track closes normally.
You will know the stop is secure when the slider hits the thread barrier without pulling it loose. The common mistake is placing the barrier below the missing tooth, leaving the slider able to enter the gap.
Step 6: Decide Whether Middle Tooth Damage Requires Replacement
A missing or broken tooth in the middle of a dress zipper generally cannot be repaired reliably with thread or glue, because the slider needs a complete opposing sequence to interlock. Replace the zipper or take the garment to an alteration professional.
A thread stop can isolate an end gap, but it cannot recreate the precise spacing, height, and interlocking geometry of a middle tooth. Adhesive is also unsuitable because it stiffens the tape and can prevent the slider from passing through the repair.
You will know replacement is necessary when the slider opens at the same middle location, catches on a tooth fragment, or passes over an empty section. The common mistake is crimping a random metal tooth onto nylon coil, which creates incompatible dimensions.
Step 7: Put a Slider Back on the Track
If the slider came off the top, remove the top stop with pliers only if the stop can be replaced afterward. Feed both zipper tapes into the slider channels evenly, keeping the teeth at the same height, then pull the slider downward several centimeters before installing a new metal stop or sewing a dense thread barrier.
The two tape edges must enter the slider symmetrically. If one side enters farther than the other, the teeth will be offset and the zipper will separate immediately.
You will know the slider is correctly installed when both sides close evenly from the bottom through the repaired area. The common mistake is forcing one tape into the slider while the other tape remains outside its channel.
Step 8: Replace a Broken Pull Tab
Thread a small paperclip, narrow split key ring, ribbon loop, or purpose-made replacement pull through the remaining hole on the slider. Use the temporary pull only if the slider body still moves smoothly and the attachment loop is not cracked.
A replacement pull restores leverage but does not repair a worn slider or damaged teeth. Trim a fabric or ribbon pull to about 3-5 centimeters so it remains easy to grasp without hanging below the dress.
You will know the temporary fix is adequate when the pull moves the slider without twisting it. The common mistake is attaching a bulky ring that catches on hair, lace, or the dress lining.
How Do You Replace a Dress Zipper?
Replacing a dress zipper requires removing the old stitching, matching the new zipper length and type, stabilizing the seam, and sewing both sides with accurate waist or neckline alignment. A home replacement usually takes 45-90 minutes, and lined or delicate dresses can take twice as long.
- Measure before removal. Measure the old zipper from the top stop to the bottom stop and buy the same length, type, and color. A replacement that is 2-3 centimeters short can change the dress opening and distort the neckline.
- Remove the old zipper. Use a seam ripper from the garment side, then remove loose threads without cutting the dress fabric. Photograph the original seam and lining placement before unpicking.
- Stabilize delicate or stretchy fabric. Add narrow fusible interfacing or temporary stabilizing tape to a weak seam allowance. Test the interfacing on an inside scrap first, especially with silk, satin, lace, and heat-sensitive synthetics.
- Baste the first tape. Place the zipper tape against the seam allowance with right sides positioned as the original zipper was. Hand-baste with 1-centimeter stitches, then close the zipper and check the top edge and waist seam.
- Stitch the first side. Use a zipper foot and sew close to the teeth without stitching into them. For an invisible zipper, use an invisible-zipper foot or roll the coil open with a regular foot.
- Align and baste the second side. Match horizontal seams, waistlines, plaid, stripes, and neckline edges before machine stitching. Misalignment becomes obvious after the dress is worn.
- Stitch and secure the second tape. Sew from the top toward the bottom stop, backstitch at both ends, and keep the seam allowance flat. Hand-stitch the lining to the zipper tape without catching the outer dress.
- Test under realistic tension. Open and close the zipper at least five times on a flat surface, then test it on a dress form or while wearing the garment carefully. Check for puckering, resistance, and seam separation.
What Is Different About an Invisible Zipper?
An invisible zipper is installed with its coil facing inward, and the stitching line must sit close enough to the coil to conceal it. The zipper foot must open or roll the coil during stitching, otherwise the seam will be too far away and the coil will remain visible.
Pressing the zipper tape lightly before sewing can help the coil lie flat, but use a low-temperature setting appropriate for the fabric and place a pressing cloth between the iron and garment. Do not press directly over plastic coil or delicate satin.
Which Repair Should You Choose?
Choose lubrication or a thread stop for a minor obstruction, a slider replacement for a worn slider with intact teeth, full zipper replacement for tooth or tape damage, and professional tailoring for delicate, valuable, lined, or structurally complicated dresses.
| Damage or situation | Best repair | Typical time | Typical cost |
|---|---|---|---|
| Thread caught in slider | Release and lubricate | 2-10 minutes | $0-$5 |
| Slider separates behind teeth | Light slider adjustment or new slider | 5-20 minutes | $0-$10 |
| Pull tab missing | Temporary or replacement pull | 2-10 minutes | $0-$8 |
| End tooth missing | Sew thread stop | 5-15 minutes | $0-$5 |
| Middle tooth missing | Replace zipper | 45-90 minutes | $5-$20 DIY |
| Torn tape or seam | Professional or full replacement | 1-3 hours | $20-$100 typical |
| Silk, chiffon, bridal, or lined gown | Alteration specialist | 1-5 days | $30-$150 typical |
Home prices vary by country, zipper brand, and garment value. The ranges above are broad typical figures in US dollars for materials and basic alteration labor, not fixed prices; specialist bridal work, rush service, beading, and multiple lining layers raise the total.
Is a Tailor Worth the Cost?
A tailor is usually worth using when the dress contains silk, chiffon, lace, sequins, boning, multiple lining layers, or a concealed zipper with a puckered seam. Professional repair also makes sense when the garment is expensive enough that one cut or misplaced stitch would cost more than the alteration fee.
A simple cotton sundress with an accessible side seam is a reasonable beginner project. A bias-cut satin gown is not a good place to practice, because the fabric can stretch permanently around the zipper and cannot always be restored by pressing.
Common Mistakes and How to Fix Them
The most damaging zipper repairs use excessive force, incompatible replacement parts, or heat and oil on delicate fabric. Each error has a safer recovery method.
| Mistake | Likely result | Safer correction |
|---|---|---|
| Pulling a snag forward | Larger fabric tear | Reverse the slider and ease fabric outward |
| Crushing the slider with pliers | Jammed or cracked slider | Use one light squeeze per side |
| Using oil or petroleum jelly | Permanent stain | Use dry soap or pencil graphite |
| Gluing a missing tooth | Stiff, unusable track | Replace the zipper |
| Heating plastic coil | Melted or distorted zipper | Use mechanical alignment only |
| Skipping basting | Crooked zipper and mismatched seams | Hand-baste both sides first |
| Sewing into zipper teeth | Broken needle or jammed slider | Stitch beside the teeth |
| Ignoring the lining | Lining caught in slider | Hand-tack lining away from the track |
Expert Repair Rules
- Test the seam before blaming the zipper. If the zipper closes flat on a table but opens when worn, tight garment fit or stretched seam allowance may be the real cause.
- Match the slider to the track, not merely the color. A black size 5 slider from one zipper family may not fit a black size 5 coil from another manufacturer.
- A zipper that repeatedly fails in the same place often signals strain. Let out the seam, reinforce the allowance, or alter the fit instead of replacing the same zipper without addressing tension.
- Invisible zipper replacement is an alignment task first and a sewing task second. Accurate waist and neckline matching matters more than sewing speed.
- Never conceal a rough repair under the lining without testing it. A slider that catches only after the lining is closed may require reopening the garment.
Variations for Different Dress Problems
How Can You Fix a Dress Zipper Without Sewing?
You can fix a dress zipper without sewing when the problem is a snagged slider, dry track, loose slider, or missing pull tab. Use tweezers, pencil graphite, bar soap, needle-nose pliers, or a paperclip, but do not attempt a no-sew repair for missing middle teeth or torn zipper tape.
For an emergency event repair, release the snag, add a temporary pull, and close the dress with a small safety pin placed inside the seam allowance. Keep the pin away from skin and remove it before laundering or dry cleaning.
What If the Zipper Works Flat but Not While Wearing?
A zipper that works flat but separates on the body is usually experiencing excessive garment tension, a stretched seam, or a dress that is too small across the bust, waist, or hips. Do not keep tightening the slider, because the underlying force can split the teeth or tear the seam.
Have the seam allowance inspected for 1-2 centimeters of possible let-out. If no allowance remains, a tailor may need to insert a wider panel or replace the zipper with a stronger style.
What If the Zipper Is on Stretch Fabric?
Stabilize knit or stretch fabric before replacing the zipper, using lightweight fusible interfacing or temporary seam tape. Keep the fabric relaxed while sewing and avoid pulling it toward or behind the presser foot.
A zipper installed into unstabilized stretch fabric can ripple immediately or fail after a few wears. A tailor is preferable when the zipper runs through a curved waist seam or a highly elastic bodycon dress.
FAQ
Can I repair a zipper that keeps opening at the bottom?
A zipper that opens at the bottom may have a missing bottom stop, damaged lower teeth, or a slider that has come off alignment. If the zipper is non-separating and the bottom stop is missing, sew a dense thread barrier at the original stop position. Replace the zipper when lower teeth are broken or the tape is torn.
How do I know whether the slider or the whole zipper needs replacement?
Replace only the slider when the zipper teeth are complete, the tape is firmly sewn, and the slider body is visibly loose or fails to interlock. Replace the whole zipper when teeth are missing in the middle, the tape is torn, the bottom stop is damaged, or the zipper separates after a correctly fitted replacement slider.
Can a tailor replace an invisible zipper with a regular zipper?
A tailor can replace an invisible zipper with a conventional coil or molded zipper if the dress design allows the change. The result may show a visible line or require a lapped installation, so the replacement should match the garment’s style, seam width, length, and fabric weight.
Why does my new zipper keep catching the dress lining?
A new zipper catches lining when the lining edge extends into the slider path or lacks a hand-tacked fold. Open the affected area, trim only excess seam allowance if safe, and hand-stitch the lining away from the zipper tape. Never cut the outer dress fabric to solve a lining problem.
How long should a repaired dress zipper last?
A lubrication or plier adjustment may last weeks or months, depending on garment tension and slider wear. A correctly installed replacement zipper can last several years with gentle use, but frequent force, washing, tight fit, and repeated dry-cleaning shorten its service life.
The Bottom Line
To fix a zipper on a dress, release trapped fabric first, lubricate with dry soap or graphite, and adjust a separating slider with one light squeeze per side. Use a thread stop only for an end gap, replace the entire zipper for middle-tooth or tape damage, and choose a tailor for delicate, lined, expensive, or highly strained garments.


