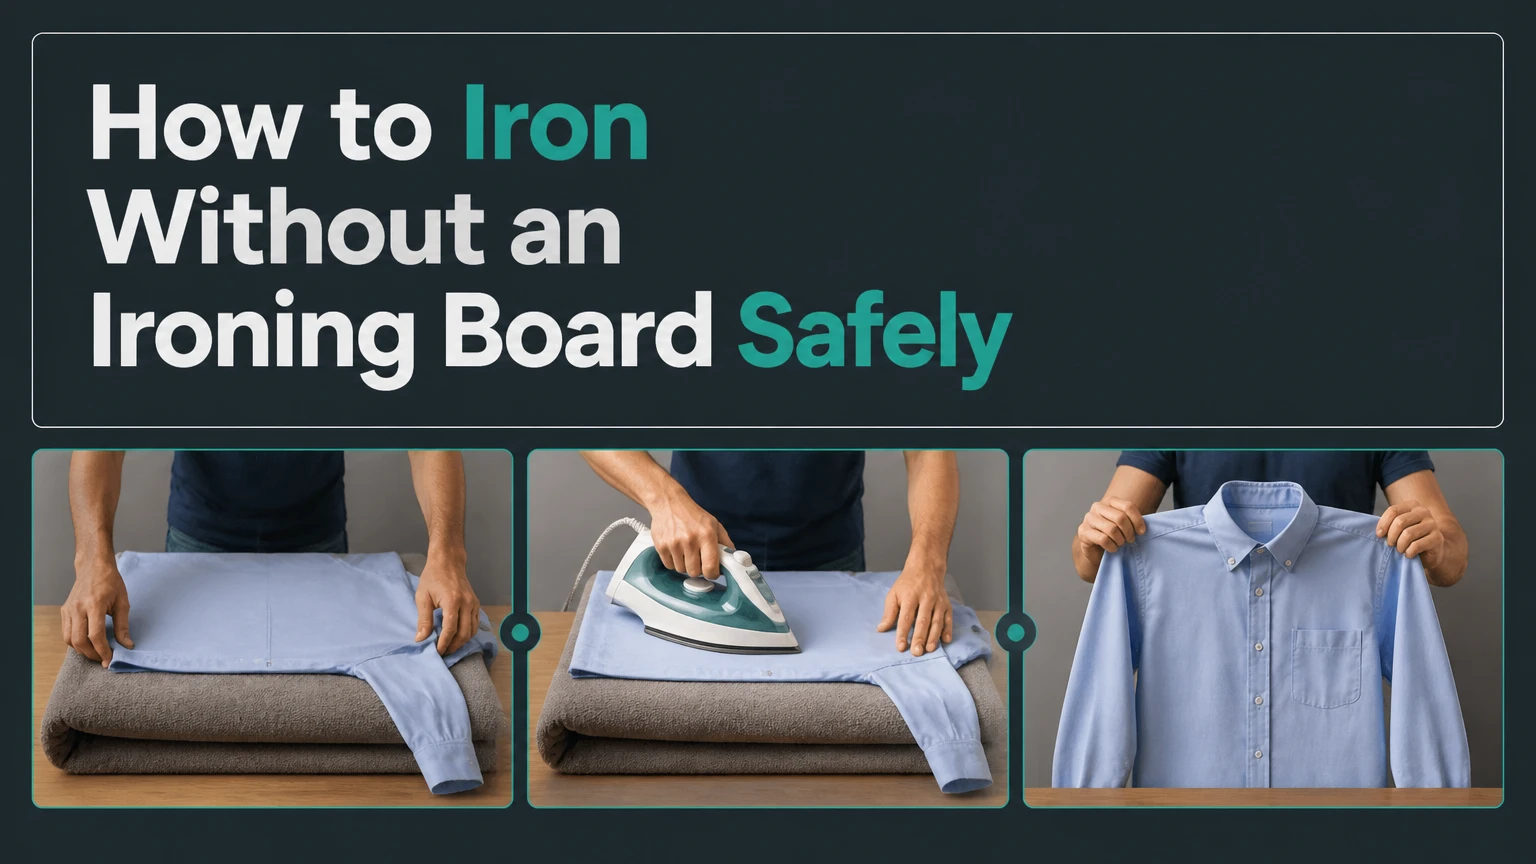
To iron without an ironing board, place the garment on two flat, dry cotton towels over a firm, heat-resistant surface such as a solid wood table, stone counter, or hard floor. Set the iron according to the care label, use controlled moisture and pressure, then leave the garment flat for about 30 seconds so the fabric cools and holds its smooth shape.
Key Facts at a Glance
- Two tightly smoothed cotton towels create a practical pressing pad for most garments.
- A firm table or counter produces sharper results than a soft bed or mattress.
- A typical shirt takes 5-10 minutes to press without an ironing board.
- A garment steamer removes body wrinkles well but cannot match an iron for knife-edge creases.
- Glass, finished veneer, unstable furniture, and synthetic fabrics exposed to excessive heat can create safety or damage risks.
- The care label determines the maximum temperature, steam suitability, and whether ironing is permitted.
What Do You Need Before You Start?
A safe temporary pressing station needs a stable base, a heat-tolerant absorbent layer, and an iron that matches the garment’s care label. The surface must remain flat while you move the iron, and the towels must be thick enough to protect the base without becoming so soft that they prevent pressure.
Before You Start
| Requirement | Typical specification | Why it matters |
|---|---|---|
| Pressing surface | 60 x 90 cm minimum for a shirt | Prevents repeated repositioning |
| Cotton towels | 2 dry towels, each 5-10 mm thick | Absorbs heat and protects the base |
| Iron temperature | 110-200°C, label dependent | Prevents melting, glazing, and scorching |
| Setup time | 2-3 minutes | Covers clearing and layering |
| Pressing time | 5-10 minutes per shirt | Includes repositioning and cooling |
| Cost | $0 using household items | Suitable for one-time use |
Use a solid table, stone counter, ceramic worktop, or clean hard floor. A bed is acceptable for light wrinkle release when no firmer surface exists, but a mattress compresses under pressure and makes crisp seams difficult.
Check the garment label before plugging in the iron. The International Textile Care Labeling Code uses an iron symbol with one, two, or three dots to indicate increasing temperature, while a crossed-out iron means the garment should not be ironed.
How to Iron Without an Ironing Board
The most reliable method is to recreate a compact ironing board with two smooth cotton towels on a firm, heat-resistant surface. The process takes 5-10 minutes for a typical shirt, and surface firmness determines the result more than extra heat.
Step 1: Choose and Inspect the Surface
Select a surface that is flat, stable, clean, and resistant to moderate dry heat and moisture. Solid wood, stone, ceramic, and hard flooring generally work when protected by towels, while glass, thin veneer, painted laminate, and plastic require a different solution or should be avoided.
Wipe away crumbs, grit, oil, and moisture. A single grain of sand under a shirt can create a visible pressure mark, and water trapped beneath a towel can affect a wood finish.
Push the table or counter gently before starting. You will know the base is suitable when it does not slide, rock, or flex under the pressure of one hand.
Common mistake: Choosing a surface because it looks flat without testing its stability. An unstable base can pull the cord, spill the iron, or produce uneven seams.
Step 2: Build the Cotton Pressing Pad
Lay one dry, 100% cotton towel on the surface and smooth it from the center toward the edges. Place a second towel on top, then remove every fold before laying down the garment.
Two towels provide more protection than one thin bath towel, but excessive padding makes the iron sink into the fabric and rounds off creases. For a firm counter, one thick cotton towel may be enough. For a hard floor, two towels improve comfort and reduce heat transfer.
Keep the towels dry when using high steam. Steam can pass through the garment and accumulate in the lower layer, particularly on a mattress or wood table.
You will know the pad is ready when a flat ruler, book, or garment edge lies without rocking across the surface.
Common mistake: Using a polyester fleece blanket or microfiber towel directly beneath a hot iron. Synthetic fibers can soften, melt, transfer texture, or leave residue at high temperatures.
Step 3: Prepare the Garment
Close zippers and undo buttons unless the care label or garment construction requires another approach. Turn dark, printed, coated, velvet, and delicate garments inside out, or use a dry cotton pressing cloth between the iron and the fabric.
Shake the garment once to loosen folds, then lay it with seams aligned. Press the collar, cuffs, waistband, and placket first because those areas establish the garment’s shape.
Spray a small amount of distilled water onto stubborn cotton or linen wrinkles if the iron has no steam function. The fabric should become slightly damp, not wet. A damp garment may need several minutes of cooling and can transfer moisture to the towel pad.
You will know the garment is positioned correctly when the seam lies straight and no buttons, zippers, or thick joins sit beneath the iron’s main soleplate.
Common mistake: Ironing over a hidden stain. Heat can set proteins, oils, and some dyes more firmly into fibers. Treat visible stains before pressing.
Step 4: Set the Iron to the Care Label
Use the lowest effective setting and allow the iron to reach temperature before touching the garment. Typical settings are low for acetate, acrylic, nylon, polyester, and silk; medium for wool and rayon; and high for cotton and linen when the label permits it.
| Fabric or garment | Typical iron setting | Moisture choice | Pressing instruction |
|---|---|---|---|
| Polyester | Low, about 110-135°C | Dry or minimal steam | Use a pressing cloth |
| Silk | Low, about 110-135°C | Usually dry | Iron inside out |
| Wool | Medium, about 150-165°C | Light steam | Lift and press rather than drag |
| Rayon or viscose | Low-medium, about 135-150°C | Light moisture | Press inside out while damp |
| Cotton | Medium-high, about 150-200°C | Steam or damp cloth | Work section by section |
| Linen | High, about 180-200°C | Steam or damp cloth | Press while slightly damp |
Temperature ranges are typical iron-setting estimates, not replacements for the garment label. Some blends, coatings, dyes, and finishes behave differently from the dominant fiber listed on the care label.
Test an inconspicuous inside seam for 3-5 seconds. The test succeeds when the fabric remains unchanged, the soleplate glides cleanly, and no shiny patch appears.
Common mistake: Starting at the highest setting because a wrinkle looks severe. Extra heat can damage a fabric before moisture and pressure have time to work.
Step 5: Press in Sections
Glide the iron slowly from the garment’s center toward an outer edge, using light pressure for delicate cloth and moderate downward pressure for cotton or linen. Lift the iron when changing direction instead of twisting it across a seam or printed area.
For shirts, press the collar underside, collar top, yoke, cuffs, sleeves, front panels, and back panel in that order. For trousers, press one leg at a time and align the inseams before creating a crease.
Use steam in short bursts rather than continuously soaking the towel pad. If the iron spits water, empty excess reservoir water and allow the soleplate to heat fully.
You will know a section is finished when the fabric looks smooth while warm, the iron has not left a shine, and the original fold does not return after a gentle lift.
Common mistake: Moving the iron rapidly over a large panel without keeping the garment aligned. Fast passes may flatten the surface temporarily while leaving twisted seams and deep folds underneath.
Step 6: Let the Garment Cool Flat
Leave the pressed garment flat for at least 30 seconds, and leave heavy trousers or linen flat for 1-2 minutes. Cooling lets the relaxed fibers settle in their new position before gravity and handling create fresh folds.
Transfer shirts to a hanger by the shoulders, not by pulling the collar or cuffs. Hang trousers from the waistband or a clamp hanger, keeping the legs aligned.
You will know the finish has set when the garment remains smooth after being lifted and the seam stays straight without hand tension.
Common mistake: Folding or wearing the garment immediately. Warm fabric is still pliable, so a fresh fold can replace the wrinkle you just removed.
Which Surface Works Best?
A firm, protected table or counter is the best household substitute for an ironing board because it combines stability, usable area, and enough resistance for controlled pressure. A towel-covered floor is the best free option for large garments, while a purpose-made ironing mat is the most predictable compact solution.
| Surface or setup | Typical cost | Setup time | Best garment | Main limitation |
|---|---|---|---|---|
| Stone or ceramic counter with towel | $0 | 1-2 minutes | Shirts, cotton trousers | Can transfer heat at exposed edges |
| Solid wood table with two towels | $0 | 2-3 minutes | Dresses, shirts, linens | Moisture may affect finish |
| Hard floor with two towels | $0 | 2-3 minutes | Bedding, large panels | Kneeling and reaching are tiring |
| Bed with one or two towels | $0 | 2 minutes | Light wrinkle release | Soft base prevents sharp creases |
| Portable ironing mat | $10-$30 | 30 seconds | Travel shirts, small apartments | Smaller pressing area |
| Garment steamer and hanger | $25-$100 | 1-2 minutes | Dresses, jackets, delicate items | Weak for pleats and sharp creases |
Is a Bed Safe for Ironing?
A bed can support light ironing when two dry cotton towels separate the garment from the mattress, but a bed is not the safest or most effective surface for heavy steam or sharp pressing. Mattresses retain moisture, compress under pressure, and can make an iron unstable.
If a bed is the only option, place the towel pad near the edge, keep the iron upright when not moving it, and use dry ironing or brief steam bursts. Never leave a hot iron unattended on a soft surface.
A bed works best for a blouse, T-shirt, or dress with ordinary wrinkles. It performs poorly for trouser creases, shirt plackets, collars, and thick seams.
Can You Iron Directly on a Counter?
Do not iron directly on a counter, even when the counter is stone or ceramic. A towel or commercial ironing mat protects the garment from grit and protects the counter from concentrated heat, moisture, dye transfer, and soleplate contact.
Granite and quartz counters tolerate household heat better than plastic laminate, but their seams, sealants, adhesives, and nearby edges may not. Keep the iron fully on the protected working area, and do not allow the cord to touch a hot surface.
Which Alternative Should You Choose?
The right alternative depends on whether the garment needs broad wrinkle removal, a sharp crease, delicate handling, or a portable setup. Direct ironing provides the strongest finish, steaming reduces handling risk, and a hair straightener solves only narrow areas.
| Need | Best option | Typical result | Time | Suitable example |
|---|---|---|---|---|
| Crisp cotton shirt | Towel-covered table | High smoothness and defined seams | 5-8 minutes | Oxford shirt |
| Delicate dress | Garment steamer | Soft wrinkle reduction | 3-5 minutes | Polyester dress |
| Trouser crease | Rigid insert plus iron | Sharp front crease | 6-10 minutes | Wool trousers |
| Collar touch-up | Hair straightener | Precise small-area finish | 1-2 minutes | Shirt collar |
| Hotel emergency | Ironing mat or towels | Moderate to high finish | 5-10 minutes | Business shirt |
| No equipment | Bathroom steam or dryer | Light wrinkle reduction | 10-20 minutes | T-shirt or blouse |
When Is Steaming Better Than Ironing?
Steaming is better for hanging garments, delicate textures, suits, dresses, and fabrics that can develop shine under a soleplate. A steamer relaxes wrinkles without requiring a pressing surface, but it cannot reliably form a trouser crease, sharpen a shirt cuff, or flatten a stubborn folded hem.
Hang the garment on a sturdy hanger with space behind it. Hold the steamer nozzle about 2-5 cm from the fabric, pull the lower hem gently downward, and move from the shoulder toward the hem.
Use ventilation in a small bathroom or hotel room. Steam that condenses on a wall, door, or mattress can create a moisture problem even when the clothing looks dry.
How Do You Use a Hair Straightener?
A hair straightener can press collars, cuffs, hems, and button plackets when the plates are clean and the temperature is set low. It cannot replace an iron for broad panels because its narrow plates cover too little fabric and can create pressure lines.
Wipe styling-product residue from the plates, allow the tool to heat, then clamp a small fabric section for 1-2 seconds while moving steadily. Keep the plates away from buttons, metal hardware, plastic prints, and coated trims.
Test an inside seam first. This method is most useful for a last-minute collar correction, not for an entire shirt.
How Can You Press Trousers and Sharp Creases?
Sharp trouser creases require a rigid pressing zone, accurate leg alignment, controlled moisture, and cooling under minimal movement. A towel-covered table alone often produces a smooth trouser leg but not a durable, straight crease.
Place a clean cutting board, firm tabletop insert, or similarly rigid heat-safe panel beneath the trouser leg, then cover it with a thin cotton pillowcase or pressing cloth. Align the inseams and side seams so the existing crease sits at the correct centerline.
Press the crease through a damp pressing cloth for 3-5 seconds at a time. Lift the iron rather than sliding it over the line, then let the leg cool flat for at least 60 seconds.
Never place a plastic cutting board beneath a hot iron. Use a wood or heat-safe composite board only when the manufacturer identifies it as heat tolerant, and keep the iron away from exposed edges.
How Do You Steam a Garment Without a Surface?
Vertical steaming needs a hanger, a secure hook or rod, a water-filled steamer, and enough clearance for the garment to hang freely. The clothing should remain vertical while steam travels from the upper section to the hem.
- Hang the garment on a plastic or wooden hanger.
- Secure the hanger to a door hook, shower rod, or wall-mounted hook.
- Pull the lower hem downward with light tension.
- Hold the nozzle 2-5 cm from the fabric.
- Move slowly from shoulder to hem, overlapping each pass.
- Steam the inside of thick sections, then allow the garment to dry while hanging.
The garment is ready when major folds have relaxed and no wet patches remain. A steamer may need two passes on linen, heavy cotton, or tightly packed luggage wrinkles.
Do not steam leather, suede, waxed cotton, or garments marked with a crossed-out steam or iron symbol. Water and heat can alter texture, sizing, adhesive interlinings, or surface coatings.
What Can You Do Without an Iron?
Without an iron, the dryer, bathroom steam, wrinkle-release spray, and controlled damp-towel methods can reduce wrinkles, although none reproduces the pressure of a soleplate. These options work best on casual garments with light or medium folds.
Dryer Method
Place the garment in a dryer with one damp, clean cotton washcloth for 10-15 minutes on low or medium heat. Remove the garment immediately, shake it out, smooth seams by hand, and hang it until dry.
The method can shrink wool, overheat elastane, or set wrinkles in heat-sensitive synthetics. Use the care label’s drying instructions rather than relying on the garment’s fiber name alone.
Bathroom Steam Method
Hang the garment outside the direct water path while running a hot shower for 10-15 minutes. Close the door to retain humidity, then smooth the fabric by hand and hang it in a ventilated area.
Bathroom steam is an emergency wrinkle reducer, not a pressing technique. It rarely creates crisp collars, cuffs, pleats, or trouser lines, and it wastes water compared with a handheld steamer.
Wrinkle-Release Spray
Spray a commercial wrinkle-release product lightly from the distance listed on its label, tug the garment into shape, and allow it to dry on a hanger. Test dark or silk-like fabrics in an unseen area because some formulas leave water rings or alter texture.
A spray works better on fresh packing folds than on set-in creases. It also cannot substitute for stain treatment or dry cleaning.
What Are the Most Common Problems?
Most failures come from an unsuitable base, excessive heat, too much water, or incorrect garment alignment. Each symptom points to a specific correction rather than a need to press harder.
| Problem | Likely cause | Immediate fix | Prevention |
|---|---|---|---|
| Iron drags | Soft or wrinkled towel pad | Replace or tighten towels | Use a firm, smooth base |
| Surface becomes damp | Excess steam or wet towels | Stop and replace towels | Use short steam bursts |
| Fabric looks shiny | Excess heat or pressure | Turn garment inside out | Use a pressing cloth and lower heat |
| Wrinkles return | Garment moved while warm | Repress and cool flat | Wait 30-120 seconds |
| Crease is crooked | Seams were misaligned | Damp-press and realign | Match inseams before pressing |
| Iron spits water | Soleplate is not fully hot | Empty reservoir and reheat | Fill only to the marked line |
| Printed area sticks | Direct heat on coating | Stop and press inside out | Keep a cotton cloth between surfaces |
What If the Base Towel Gets Wet?
Stop adding steam and replace the wet lower towel with a dry one. Moisture trapped under a garment can affect wood finishes, leave rings on some counters, and prolong drying in thick fabrics.
If the surface is wood, inspect it after the setup is removed and wipe away condensation immediately. Do not continue pressing until the towel pad and base are dry.
What If the Iron Leaves a Shine?
A shiny patch usually means excessive temperature, pressure, or direct contact on a dark, wool, synthetic, or rayon fabric. Turn the garment inside out, place a damp cotton pressing cloth over the area, and use short lifted presses at the label-approved setting.
Some shine results from permanent fiber flattening and will not disappear completely. Testing first is safer than trying to repair a damaged surface.
What If Wrinkles Remain?
Persistent wrinkles usually indicate insufficient moisture, an overly soft surface, a thick seam, or a garment that was never pulled flat. Reposition the item, smooth the underlying towel, and work in smaller sections.
For cotton and linen, add controlled moisture through steam or a lightly damp pressing cloth. For polyester, reduce heat and use tension instead, because high heat can create a new sheen or permanently reshape the fabric.
How Should You Adapt the Method by Situation?
The same pressing method does not suit every location. A dorm room, hotel, small apartment, and emergency bathroom setup each impose different constraints on stability, storage, ventilation, and available heat.
Hotel Room
Use the hotel’s ironing mat if supplied. Otherwise, place two dry cotton towels on a desk or solid luggage bench only after checking that the surface is stable and not made from thin laminate.
A portable ironing mat typically costs $10-$30 and weighs less than a full board. Add a pressing cloth, a small spray bottle, and a travel steamer if frequent business travel makes wrinkle removal a recurring need.
Avoid placing a hot iron on a towel-covered bed when a desk is available. A desk gives better control and reduces the chance of the iron tipping.
College Dormitory
For a one-time presentation, use a clean desk with two cotton towels and a standard iron, or use a hair straightener for a collar and cuffs. A wrinkle-release spray is suitable for T-shirts but usually leaves a formal shirt less crisp than direct pressing.
Keep the iron on a stable heat-safe area, never on a plastic desk surface. Unplug the iron immediately after the final garment and confirm that the soleplate is cooling in an upright position.
Small Apartment
A roll-up ironing mat is more consistent than improvised towels when counter space is limited. Store the mat vertically and use a dining table or kitchen counter underneath it.
Typical compact-kit cost is $15-$60 for a mat, pressing cloth, and small spray bottle. A garment steamer costs more but avoids the need to clear a horizontal surface.
Delicate or Formal Clothing
Use a steamer for a lined dress, jacket, or loosely structured garment, then use a low-temperature iron and pressing cloth only where a sharper edge is necessary. Follow the care label and test hidden fabric because interlinings and decorative coatings can respond differently from the outer fiber.
Professional cleaners and textile-care manufacturers commonly emphasize the care label because fiber content alone does not reveal finishes, blends, adhesive layers, or dye sensitivity. The label is the controlling instruction.
Expert Rules That Prevent Damage
- Pressure cannot compensate for wrong heat. A low-temperature iron with a damp pressing cloth often removes a cotton wrinkle more safely than a dry iron at maximum heat.
- A towel pad should protect, not cushion. If the iron sinks visibly into the towels, remove one layer or switch to a firmer mat; excessive softness rounds edges and weakens creases.
- Pressing and steaming create different finishes. Steam relaxes fibers while hanging, whereas pressing combines heat, moisture, and compression to create a flatter, more defined shape.
- Cool the garment before judging the result. Warm fibers can look smooth and then rebound as they cool, so inspect the section after at least 30 seconds.
- Work from structural details outward. Collars, cuffs, waistbands, plackets, and seams determine how the rest of a garment lies; pressing broad panels first can lock in misalignment.
Frequently Asked Questions
Can I iron on a towel without another layer underneath?
A towel alone is appropriate only when the surface beneath it is stable, heat tolerant, and protected from moisture. Two dry cotton towels are safer for a hard floor or table because they provide more insulation and absorb condensation. The towel must remain flat, and synthetic fleece or microfiber should not be used as the direct heat barrier.
Can I iron on a wooden table?
You can iron on a solid wooden table when two dry cotton towels or a heat-resistant ironing mat cover the surface. Avoid veneered, painted, lacquered, or visibly damaged wood because heat and steam may affect adhesives, finishes, or moisture-sensitive coatings. Use short steam bursts and inspect the table after removing the pad.
How do I remove wrinkles from linen without an ironing board?
Place linen on two smooth cotton towels over a firm table, use the high setting only if the care label permits it, and apply steam or a damp pressing cloth. Press while the linen is slightly damp, working in sections from seams outward. Leave the garment flat for 1-2 minutes because linen creases easily while warm.
Can I use aluminum foil instead of an ironing board?
Aluminum foil can reflect heat beneath a thin pressing pad, but it does not provide stability, cushioning, or moisture absorption. Do not place foil directly under a hot iron or directly against the garment, since sharp folds can imprint the fabric and exposed foil can create an unstable setup. A commercial ironing mat is more predictable.
How do I iron a shirt collar without an ironing board?
Lay the collar flat on a towel-covered table and press the underside first, moving from the collar points toward the center. Use a pressing cloth for dark or synthetic shirts, and keep the iron at the care-label setting. A clean hair straightener can touch up the collar edge for 1-2 seconds per section when an iron is unavailable.
Is steaming as effective as ironing?
Steaming is effective for reducing hanging wrinkles but less effective for sharp creases, pleats, cuffs, and thick seams. A garment steamer typically takes 3-5 minutes for a dress or shirt, while direct ironing on a protected firm surface takes about 5-10 minutes and produces a more structured finish.
The Bottom Line
The safest way to iron without an ironing board is to use a stable table, counter, or hard floor covered by two smooth, dry cotton towels. Follow the care label, test a hidden area, control steam, and cool each garment flat before hanging it. Choose vertical steaming for delicate or structured garments, and use a rigid protected insert when trousers need a sharp crease. The exact keyword, how to iron without an ironing board, describes a practical substitute for a board, not a reason to ignore surface safety or fabric-care instructions.


