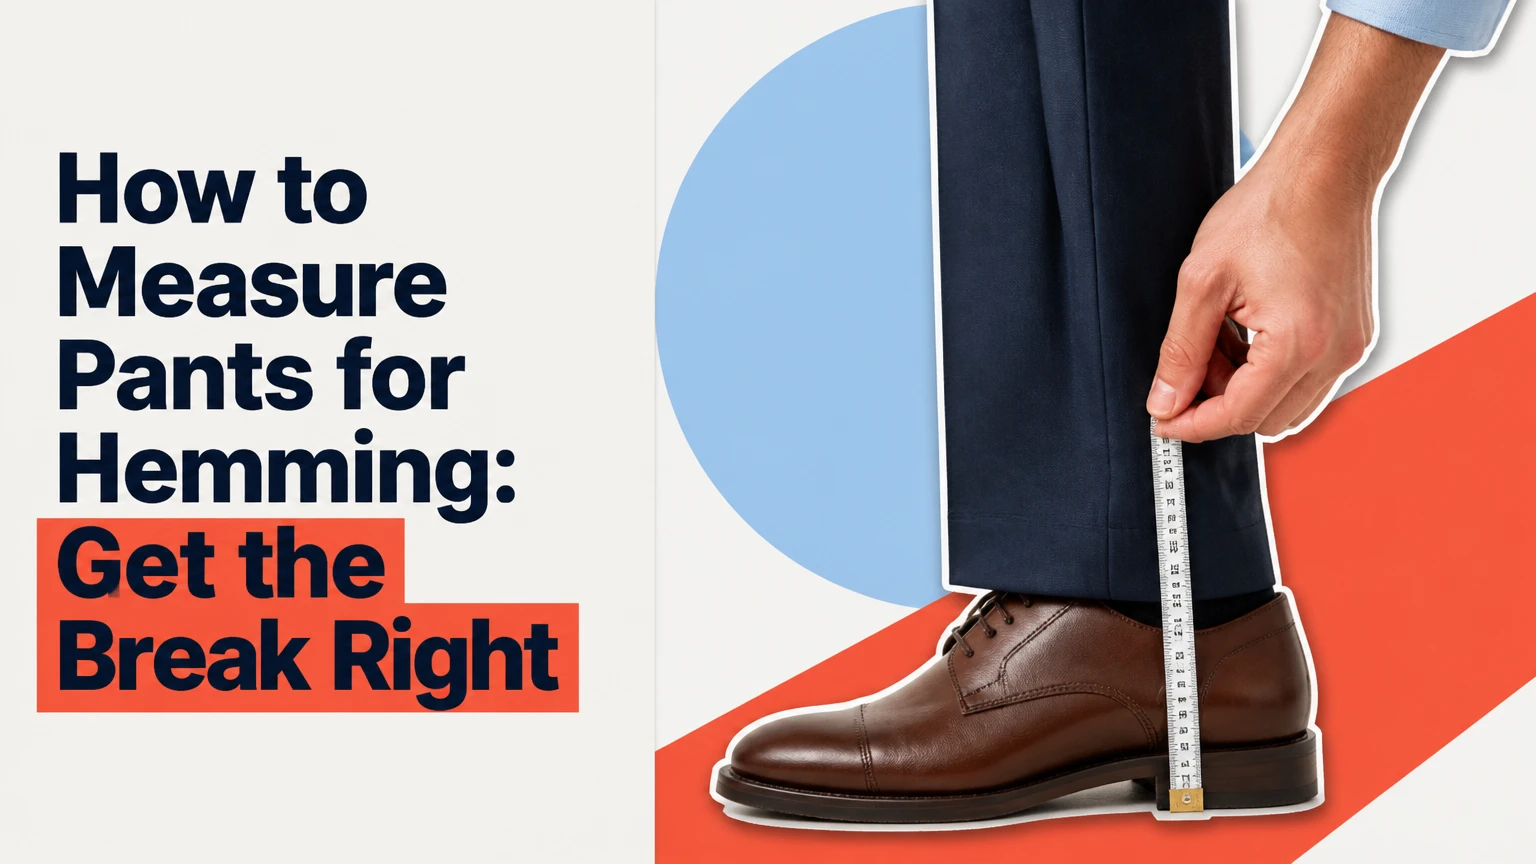
To measure pants for hemming, wear the pants with the shoes and belt you normally use, stand in a relaxed upright posture, fold each leg to the desired break, pin the fold, then measure from the crotch seam to the pinned edge. Record the left and right inseams separately, because legs, posture, and existing construction can differ.
Key Facts at a Glance
- The inseam runs from the crotch-seam intersection to the finished bottom edge of the pant leg.
- The final hem length depends on the shoe, rise, leg shape, fabric weight, and chosen pant break.
- A tailor needs the finished inseam or a pinned fitting, not only the amount of fabric to remove.
- Measure and mark both pant legs individually; do not assume one leg matches the other.
- Typical DIY hemming takes 15-45 minutes after fitting, while professional work commonly takes 2-7 days.
- Wash or otherwise pre-shrink washable pants before marking the final length.
Before You Start
Prepare the pants, shoes, and measuring tools before fitting. The most reliable setup uses a full-length mirror and a second person, because bending to pin your own hem changes the way the trousers hang.
| Requirement | Typical specification | Why it matters |
|---|---|---|
| Flexible tape measure | 60 inches or 150 centimeters | Measures the inseam along the seam |
| Straight pins | 8-12 pins per leg | Holds the temporary fold securely |
| Fabric chalk or washable marker | 1 contrasting color | Marks the fold and cutting line |
| Full-length mirror | At least 48 inches tall | Shows shoe contact and front break |
| Fitting shoes | Usual pair or same heel height | Sets the actual floor-to-hem relationship |
| Flat work surface | 36-60 inches wide | Allows accurate post-fitting measurement |
Check the garment first
Inspect the existing hem before measuring. Look for cuffs, lining, a heel guard, a decorative topstitch, a chainstitch, rivets near the ankle, or a distressed denim edge. These details determine whether a simple shortening operation is possible.
Wash and dry cotton, denim, linen, and other washable fibers according to the care label before fitting. Wool trousers and dry-clean-only garments should be cleaned and pressed as recommended, because pressing can change the apparent length without shrinking the fiber in the same way as a hot wash.
Set up the fitting position
Put on the pants, fasten the normal belt, and stand on a hard, level floor. Keep your head facing forward, distribute your weight evenly, and allow your arms to hang naturally. A mirror or partner should inspect the side and rear views while you remain still.
Do not measure after pulling the waistband higher or lower than you normally wear it. A change in rise changes the crotch position and therefore changes the inseam even when the trouser leg itself has not changed.
How to Measure Pants for Hemming
The practical method takes six actions: prepare the garment, wear the correct shoes, establish the intended break, pin both legs, transfer the marks to a flat surface, and measure each inseam. The fitting stage determines style; the flat measurement records that decision accurately enough for sewing or a tailor’s work order.
Step 1: Wear the final shoes and belt
Put on the shoes that will normally accompany the pants. Match heel height precisely for dress shoes, boots, and high heels, because a 1-inch heel changes the visible front length and the angle at which the trouser leg falls.
Fasten the belt at its usual setting. Stand naturally for at least 30 seconds before pinning so the waistband settles into its normal position.
You will know it worked when: the waistband sits where you normally wear it and the shoe is the actual shoe, or has the same sole and heel height.
Common mistake: measuring in socks and adding shoes later. The resulting hem often drags at the back or rises too far above the shoe.
Step 2: Decide where the hem should finish
Choose the pant break before folding fabric. The break is the crease created when the front of the trouser leg meets the shoe. Slim trousers and casual pants generally need less fabric at the ankle than wide, heavy, or traditionally tailored trousers.
Use the following table as a starting point, then judge the result while standing and walking.
| Break style | Typical shoe contact | Common finished appearance | Suitable garments |
|---|---|---|---|
| Full break | Fabric reaches 1-2 inches onto shoe | Two or more visible folds | Wide wool trousers, heavy denim |
| Half break | One fold, about 0.5-1 inch | Conservative single crease | Business trousers, regular-fit chinos |
| Quarter break | About 0.25-0.5 inch contact | Small front ripple | Slim trousers, modern chinos |
| No break | 0-0.25 inch contact | Clean edge above shoe | Cropped pants, narrow denim, summer trousers |
These values are visual guidelines, not universal rules. A heavy wool trouser can create a full break at a shorter measured inseam than a lightweight linen trouser because fabric weight and drape change the fold.
Step 3: Fold the excess fabric inward
Ask a partner to fold the lower edge inward, toward the inside of the leg. Start with a shallow fold and adjust it in small increments of approximately 0.25 inch until the front, side, and back views look balanced.
Place one pin at the front crease, one at the outer seam, one at the inner seam, and several around the remaining circumference. Keep the temporary fold parallel to the existing hem unless the garment needs a deliberate boot or heel adjustment.
You will know it worked when: the folded edge forms a continuous, level line around the leg without twisting the side seam.
Common mistake: pinning only the front. The back can remain too long, producing heel drag even when the front looks correct.
Step 4: Walk, sit, and bend your knees
Test the pinned length in motion. Walk several steps, sit in a chair, climb one stair, and bend both knees. Check whether the leg rises excessively when seated or catches on the shoe when walking.
A trouser hem that looks perfect while standing can feel restrictive if the leg opening is narrow or the fabric has little ease. Stretch denim usually tolerates a shorter length than rigid denim because movement pulls the fabric upward.
For dress trousers, keep the hem level unless a tailor recommends a minor adjustment for the shoe shape. For boots with a pronounced shaft or angled vamp, the front and back may require different visual treatment.
Step 5: Remove the pants without losing the marks
Remove the pants carefully, keeping the pins in place. Place the garment on a table with the legs aligned only after confirming that the two pinned folds are individually correct.
Mark the folded edge with tailor’s chalk. Then mark a separate cutting or raw-edge line below the finished edge, leaving the required hem allowance for the selected construction.
Step 6: Measure both finished inseams
Lay one leg flat without stretching it. Run the tape from the exact crotch-seam intersection down the inner leg to the folded finished edge. Keep the tape aligned with the inseam rather than measuring diagonally across the fabric.
Repeat for the other leg. Record the result as “left finished inseam” and “right finished inseam,” for example, 30 3/8 inches left and 30 1/2 inches right.
You will know it worked when: the measurement starts at the same crotch point on both legs and ends at the intended finished edge, not at the temporary raw edge.
Common mistake: measuring from the existing bottom edge after pinning. The existing hem may be uneven, stretched, or shaped for a different break.
Which Measurement Should You Give a Tailor?
Give a tailor the desired finished inseam, the shoes used for fitting, and the preferred break, or bring the pants pinned for a live fitting. The amount to remove is less useful because the existing hem allowance, waistband position, and construction details can make the subtraction inaccurate.
Inseam versus outseam
The inseam is the inside-leg distance from crotch to hem. The outseam runs from the top of the waistband down the outside seam to the bottom edge. Tailors usually rely more heavily on the finished inseam and a fitting because outseam changes with the rise and waistband position.
| Measurement | Starting point | Ending point | Best use |
|---|---|---|---|
| Finished inseam | Crotch-seam intersection | Finished hem edge | Hem-length specification |
| Existing inseam | Crotch-seam intersection | Current bottom edge | Estimating alteration amount |
| Outseam | Top waistband edge | Current or finished hem | Comparing rise and overall proportions |
| Hem circumference | Around leg opening | Existing or proposed edge | Checking taper and hem construction |
To calculate a rough removal amount, subtract the desired finished inseam from the current finished inseam. For example, a 32-inch current inseam minus a 30-inch target inseam suggests removing 2 inches, but the tailor must still check the available hem allowance and the original construction.
What should you tell a tailor?
Provide four details: the finished inseam, the shoe type, the desired break, and whether the original hem must remain. Add whether you want a blind hem, visible topstitching, a cuff, or a heel guard.
A useful handoff sounds like this: “Please finish the left inseam at 30 3/8 inches and the right at 30 1/2 inches, using these sneakers, with a quarter break. Preserve the original jean hem if possible.”
How Much Fabric Should You Leave Below the Mark?
Leave enough material for the selected hem construction, then mark the cut line below the finished edge. Typical allowances are 1-1.5 inches for a simple trouser hem, 1-1.25 inches for many jeans, and 2-4 inches for a turn-up cuff depending on cuff width and internal construction.
| Hem construction | Typical finished fold | Typical allowance below finished edge | Cutting caution |
|---|---|---|---|
| Blind trouser hem | 1-1.5 inches | 1-1.5 inches | Preserve lining and pressing |
| Jeans topstitch hem | 0.5-1 inch | 1-1.25 inches | Match thread and stitch spacing |
| Original denim hem | Factory edge retained | 0.25-0.5 inch for reattachment | Requires visible seam placement |
| Turn-up cuff | 1.5-2 inches visible | 3-4 inches total | Needs sufficient internal fabric |
| Narrow casual hem | 0.5 inch rolled edge | 0.75-1 inch | Bulky fabrics may not roll cleanly |
Never cut exactly on the desired finished line. The finished edge is the location after folding, pressing, and stitching, while the raw cut edge sits above or inside that fold.
How Much Break Should Pants Have?
A half break is the safest default for traditional business trousers, while a quarter break suits slim modern trousers and no break suits cropped or deliberately sharp casual styles. Full break trousers need enough length to form a controlled fold without creating rear-floor drag.
| Pant style | Starting break recommendation | Typical visual priority | Avoid when |
|---|---|---|---|
| Classic suit trouser | Half break | Conservative balance | Leg is very narrow |
| Slim wool trouser | Quarter break | Clean front line | Fabric is exceptionally heavy |
| Straight-leg chino | Quarter to half break | Casual shoe contact | Shoe is very low and flat |
| Skinny or cropped jean | No break | Clear ankle opening | Cold-weather boot styling |
| Wide-leg trouser | Half to full break | Weight and drape | Floor is uneven or wet |
Break preference is partly personal. The measurable rule is that the hem must remain clear of the floor and must not create uncontrolled stacking around the ankle.
Which Hem Type Fits Each Pair of Pants?
The best hem type matches the garment’s fabric, original stitching, and intended appearance. A blind hem hides stitching on tailored trousers, a topstitched hem suits jeans and chinos, an original hem preserves denim character, and a cuff adds weight and visual structure.
| Hem type | Typical garment | Visible stitching | Typical labor complexity | Main limitation |
|---|---|---|---|---|
| Blind hem | Wool trousers, suit pants | Minimal or invisible outside | Medium | Poor match for rugged denim |
| Topstitched hem | Jeans, chinos, work pants | Yes, usually 1-2 rows | Low to medium | Thread color must match |
| Original hem | Distressed or designer denim | Factory edge retained | Medium to high | Can shorten the usable leg significantly |
| Cuffed hem | Suit trousers, flannel pants | Folded outer cuff | Medium | Requires extra fabric and stable drape |
An original denim hem is not always possible. If the desired shortening exceeds the distance between the original hem and a nearby design feature, reattaching the factory edge can place a bulky seam in the wrong location.
A heel guard is a narrow protective strip sewn inside the back hem of some dress trousers. It can reduce abrasion from the shoe heel, but it does not correct an incorrectly measured length.
Can You Measure Pants Without Wearing Them?
You can measure pants flat for an estimate, but a worn fitting is more reliable for the final hem because posture, waistband position, fabric drape, and shoe height affect the result. Flat measurement works best when copying a trusted pair with the same rise, cut, fabric, and intended footwear.
To use a reference pair, close the waistband, lay the pants flat without stretching, and measure from the crotch intersection to the finished edge along the inseam. Compare the reference garment’s leg opening, rise, and silhouette before transferring its inseam.
Flat measurements become unreliable when the pants have a different rise. High-rise trousers can have the same inseam as low-rise jeans but sit at a different position on the body, changing the apparent ankle length and shoe contact.
How Should Pants Be Measured for Different Shoes?
Measure pants in the shoes that will be worn most often, because heels, boots, sneakers, and loafers alter the hem’s relationship with the floor. If one pair must work with several shoes, choose the dominant heel height and avoid a length that depends on a single extreme shoe.
Boots
Wear the actual boots, including the socks and foot position used normally. A boot’s shaft, heel, and angled vamp can make the front appear shorter than the back. Mark the hem while standing, then check that the rear edge clears the heel without excessive stacking.
A slight front-to-back adjustment may help some boot styles, but it should be created by shaping the hem carefully rather than cutting a visibly diagonal line without fitting. A tailor should perform this adjustment on formal trousers.
Heels
Measure with the final heel height, not merely the shoe size. A 3-inch heel can require a substantially longer trouser than a flat shoe, while a wide-leg trouser may be intended to skim the top of the shoe rather than expose the ankle.
Do not hem one pair for both flats and high heels unless the style deliberately accommodates both. The resulting compromise often drags with flats and looks cropped with heels.
Sneakers and loafers
Low-profile shoes usually need a quarter break or no break for slim trousers. Bulky sneakers can support a little more front contact, but the hem should not cover the shoe’s upper so deeply that the leg collapses over the laces.
How Does Fabric Change the Measurement?
Fabric affects the visual break, shrinkage risk, and ease required for movement. Denim, cotton, and linen may shrink if washed; wool can change shape through pressing and moisture; stretch fabric can ride upward during walking and therefore needs a movement check.
| Fabric or blend | Pre-measurement treatment | Typical behavior | Measurement concern |
|---|---|---|---|
| 100% cotton twill | Wash and dry per care label | Can shrink noticeably | Do not hem before first wash |
| Rigid denim | Wash and dry before final marking | Shrinks and softens | Preserve original hem carefully |
| Stretch denim | Wash before marking | Recovers after movement | Check knee bend and sitting |
| Linen | Wash or steam as labeled | Can relax and crease | Judge length after pressing |
| Wool suiting | Press or dry-clean as labeled | May relax with steam | Fit after final pressing |
| Polyester blend | Usually low shrinkage | Holds shape | Check drape and seam twist |
Shrinkage is not a fixed percentage across garments. The fiber blend, finishing process, washing temperature, drying method, and garment manufacturer all affect the final change, so the care label is more reliable than a generic shrinkage assumption.
Common Mistakes and How to Fix Them
Most failed pant hems result from a wrong fitting condition rather than a sewing error. The recovery depends on whether the fabric has been cut and whether enough hem allowance remains.
| Mistake | Result | Recovery before cutting | Recovery after cutting |
|---|---|---|---|
| Looking down while pinning | Waist and crotch shift | Refit with a partner and mirror | Refit and check remaining allowance |
| Measuring barefoot | Hem drags with shoes | Repeat in final shoes | Add length only if fabric remains |
| Copying one leg | Uneven ankle edges | Record left and right separately | Recut only the longer or shorter side |
| Cutting on finished line | Insufficient fold allowance | Add allowance below mark | Use a narrow hem or consult a tailor |
| Ignoring shrinkage | Pants become too short | Wash or press, then refit | Lengthen only if internal fabric exists |
| Stretching the fabric | Inseam measures too long | Lay fabric relaxed and repeat | Press, release tension, and reassess |
The leg-length asymmetry problem
Human posture and garment construction can make one leg appear longer. A difference of 1/8-1/4 inch is not unusual during fitting, especially when one hip carries more weight or one trouser leg twists at the seam.
Do not “correct” the difference by forcing both measurements to match. Preserve the visual balance observed while standing, and let the tailor inspect whether the cause is the garment, posture, shoe, or a twisted inseam.
The pinning safety problem
Pins placed perpendicular to the edge are more likely to prick the wearer or fall out during removal. Use safety pins for a live fitting when possible, or place sharp pins with the point facing inward and remove the pants slowly.
Never walk across a room with multiple unsecured pins. Mark the fold with chalk before removing the garment so the measurement does not depend entirely on the pins.
How Much Does Hemming Cost and Take?
Typical professional pant hemming costs about $10-$35 in the United States, with a 2-7 day turnaround; original denim hems, cuffs, lining, and complicated trouser construction usually cost more. DIY materials commonly cost $0-$15 if a sewing kit is already available, and the work takes about 15-45 minutes after the fitting.
Prices vary by city, tailor, fabric, and whether pressing or pickup is included. The figures below are practical typical ranges, not a universal price list.
| Service or method | Typical cost | Typical time | Main price driver |
|---|---|---|---|
| DIY hand-sewn hem | $0-$15 | 30-60 minutes | Thread, needle, pressing |
| DIY machine hem | $0-$15 | 15-45 minutes | Stitch matching and setup |
| Standard trouser hem | $10-$25 | 2-5 days | Blind stitch and pressing |
| Jeans topstitch hem | $10-$25 | 2-5 days | Thread and denim thickness |
| Original denim hem | $20-$45 | 3-7 days | Cutting and reattaching factory edge |
| Cuffed or lined trouser hem | $20-$50 | 3-7 days | Allowance, lining, and pressing |
A tailor may quote by garment rather than by inch because the alteration amount does not predict the labor. Removing 1 inch from a lined suit trouser can take more work than removing 4 inches from a plain cotton pant.
What Information Should You Take to a Tailor?
Take the pants, the primary shoes, and a clear length instruction. A pinned fitting is better than a handwritten number when the garment has a cuff, taper, unusual rise, lining, or visible distressing.
Use this checklist:
- State the left and right finished inseams if they differ.
- Name the intended shoe, heel height, or boot style.
- Specify no break, quarter break, half break, or full break.
- Request blind stitching, visible topstitching, a cuff, or an original denim hem.
- Ask whether the existing hem allowance is sufficient.
- Confirm whether the pants should be washed, pressed, or dry-cleaned first.
- Ask for a fitting before cutting if the alteration exceeds 2 inches.
A professional tailor should also check whether tapering, a twisted leg, or a low or high rise is causing the apparent length problem. Hemming alone cannot correct every fit issue.
FAQ
Should pants touch the floor before hemming?
No. Pants should be fitted with the intended shoes so the finished edge clears the floor while creating the selected break. The temporary fold can touch the shoe lightly at the front, but the back edge should not drag under the heel or bunch against the ground.
How do you measure pants for hemming with a cuff?
Fold the desired cuff outward during the fitting, not inward, and judge the visible cuff width while wearing the final shoes. A traditional cuff commonly measures 1.5-2 inches, so the pants need roughly twice that depth inside the leg, plus a small allowance for the fold and stitching.
Can a tailor use the inseam from another pair?
A tailor can use another pair as a reference if both garments share the same rise, cut, fabric weight, leg opening, and shoe use. Bring the reference pair physically when possible. A numerical inseam alone cannot reproduce a different trouser’s break or drape.
Should jeans be hemmed before or after washing?
Wash and dry jeans according to the care label before final hemming, particularly when they contain cotton or are rigid denim. Prewashing reduces the chance that later shrinkage will make the finished inseam too short, although repeated hot drying can continue to change the garment.
Why do hemmed pants twist at the ankle?
An ankle twist can come from a distorted inseam, uneven leg shape, incorrect pinning, or a side seam that was already rotated. Press the garment and refit it while standing before cutting. If the seam spirals around the leg, ask a tailor to diagnose the construction instead of simply trimming the bottom.
Is a 30-inch inseam always the same pant length?
No. A 30-inch inseam measures the crotch-to-hem distance, but the visible length changes with rise, leg width, fabric drape, shoe height, and break preference. Two pants with a 30-inch inseam can sit and look different, so fit the actual garment rather than relying on the label.
The Bottom Line
To measure pants for hemming accurately, wear the final shoes and belt, stand naturally, choose the break, pin each leg separately, test the length while moving, and record both finished inseams from the crotch seam to the pinned edge. Prewash washable fabrics, leave the correct hem allowance, and tell the tailor the shoe, break, and hem style.


