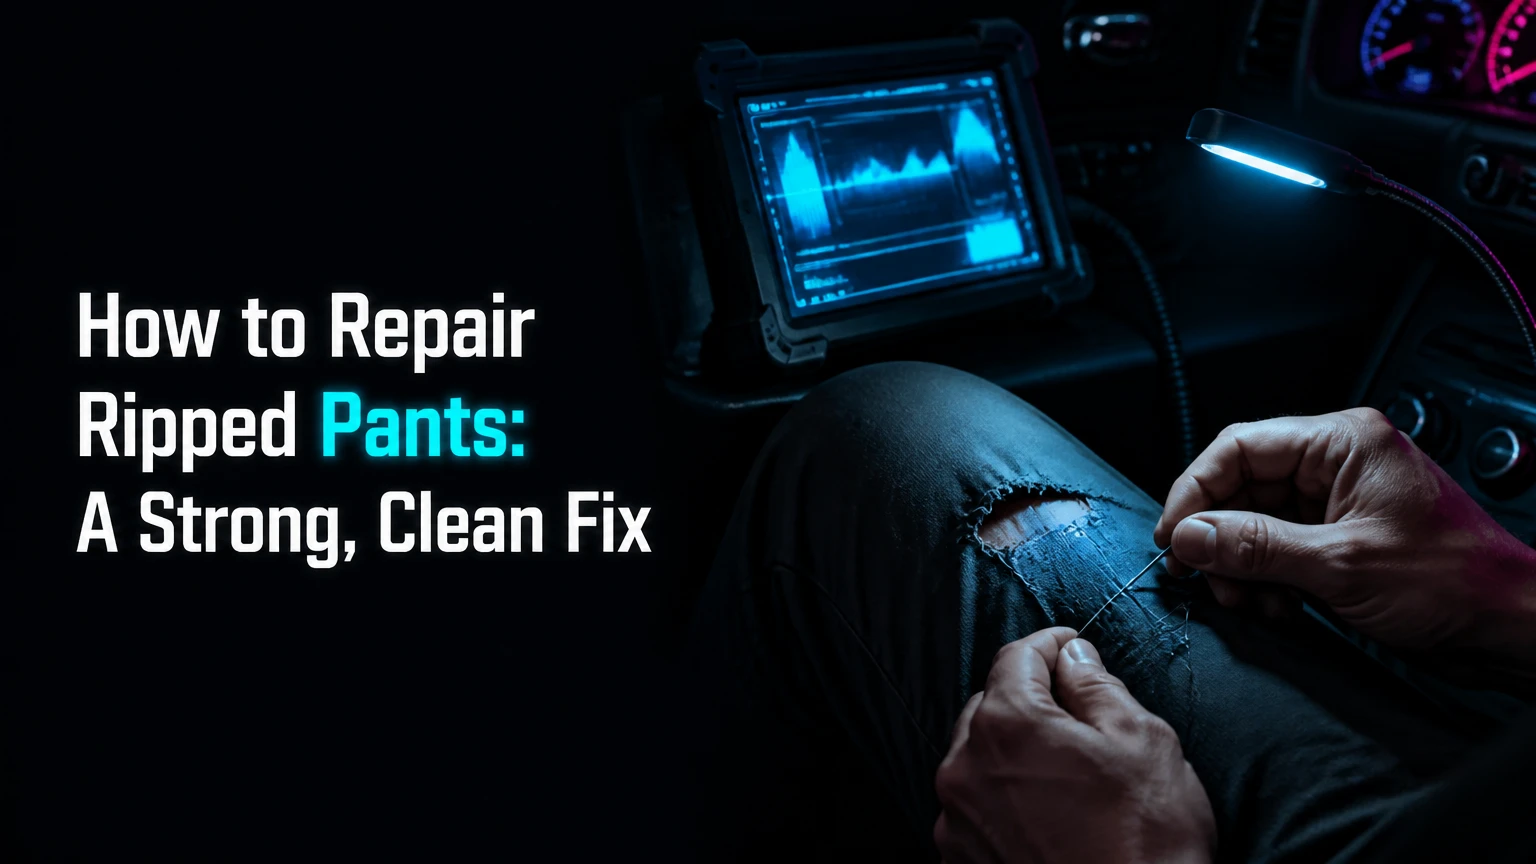
To repair ripped pants, first identify whether the damage is an open seam, a clean tear, a frayed hole, or thinning fabric. Close intact seam edges with a ladder or backstitch, reinforce holes from the inside with a fabric patch and dense stitches, or use an iron-on patch for a fast low-stress repair. The damaged location and fabric determine durability.
Key Facts at a Glance
- A popped seam can usually be repaired invisibly in 15-30 minutes with a ladder stitch.
- A patch should extend at least 15 mm beyond the damaged area on every side.
- Denim crotch blowouts need reinforcement beyond the visible hole because surrounding fabric is often already weakened.
- A sewing-machine repair generally withstands more abrasion than an adhesive-only patch.
- Iron-on adhesive requires the correct fabric temperature, firm pressure, no steam, and complete cooling before movement.
- Delicate wool trousers, large tears, and damaged waistbands are safer candidates for a professional tailor.
How to Repair Ripped Pants by Damage Type
The correct pants repair depends on what failed, not simply how large the visible rip looks. A separated seam has intact fabric and needs edge-to-edge stitching, while a hole has missing or weakened yarns and needs a backing layer, darning, or visible patching.
Inspect the garment in good light and turn it inside out. Look for continued thinning around the rip, loose warp or weft threads, pulled seam allowance, and damage that extends farther than the opening. A two-centimeter hole in stable denim is easier to repair than a one-centimeter hole surrounded by translucent, threadbare fabric.
Choose the repair method
| Damage or location | Best primary method | Typical time | Typical material cost | Expected result |
|---|---|---|---|---|
| Open side or inseam seam | Ladder stitch or machine straight stitch | 15-30 minutes | $2-$5 | Nearly invisible closure |
| Clean tear with stable edges | Small backstitches plus inside patch | 20-40 minutes | $3-$8 | Strong, low-visibility repair |
| Denim knee hole | Machine darning with denim backing | 15-30 minutes | $3-$10 | High abrasion resistance |
| Crotch blowout | Inside patch plus dense zigzag or darning | 30-60 minutes | $5-$15 | Reinforced stress-zone repair |
| Inner-thigh thinning | Preventive inside patch and darning | 30-60 minutes | $5-$15 | Slows further abrasion |
| Lightweight casual fabric | Fusible interfacing or hand patch | 10-25 minutes | $3-$8 | Fast repair with some stiffness |
| Suit wool or tailored trousers | Tailor’s reweaving or seam reconstruction | 1-7 days | $25-$100+ | Best appearance and shape retention |
| Waterproof nylon shell | Compatible repair tape or patch | 5-20 minutes | $5-$15 | Functional, often visible |
The method must reach healthy fabric. Stitching only along the ragged opening leaves unstable yarns carrying the same stress that caused the failure.
What tools and materials do you need?
A basic pants-repair kit requires a sharp needle, matching thread, small scissors, pins or clips, an iron for fusible materials, and a stable fabric patch. Heavy denim additionally benefits from a jeans needle, a thimble, strong polyester thread, and a sewing machine with a manual reverse function.
Wash and dry the pants before repairing them unless the garment is urgently needed. Dirt, body oil, and fabric softener can reduce adhesive bonding and make accurate alignment difficult. Do not trim every loose thread from a large hole; remove unstable fuzz, but preserve sound threads that can help bridge the opening.
| Fabric or garment | Hand needle | Machine needle | Thread | Starting stitch setting |
|---|---|---|---|---|
| Dress shirt fabric or lightweight cotton | Sharp 60/8-70/10 | Universal 70/10 | Fine polyester or cotton-polyester | 1.5-2.0 mm |
| Chinos and medium cotton twill | Sharp 70/10-80/12 | Universal 80/12 | All-purpose polyester | 2.0-2.5 mm |
| Stretch denim or jersey | Ballpoint 70/10-80/12 | Stretch or ballpoint 75/11-90/14 | Polyester with controlled tension | 2.5-3.0 mm |
| Standard denim | Heavy sharp needle | Jeans 90/14 | Polyester or cotton-wrapped polyester | 2.5-3.0 mm |
| Heavy workwear canvas | Upholstery or denim needle | Jeans 100/16 | Heavy polyester | 3.0-3.5 mm |
| Suit wool | Fine sharp needle | Universal 70/10-80/12 | Matching wool, silk, or fine polyester | 1.5-2.0 mm |
| Nylon outdoor pants | Sharp 70/10-80/12 | Microtex 80/12 | Polyester thread | 2.0-2.5 mm |
Needle numbers describe the needle system size: a larger number generally indicates a thicker needle. The American Sewing Guild recommends selecting needle size according to fabric weight and thread thickness rather than using one universal needle for every garment.
A fusible patch should be compatible with the fabric’s care label. Polyester, coated nylon, elastane, and waterproof laminates can melt, glaze, shrink, or lose their finish under household-iron temperatures.
How do you repair a ripped pants seam by hand?
Repair an open seam with a ladder stitch when both seam edges remain intact and the fabric is not shredded. The inside-out repair usually takes 15-30 minutes, and the key success factor is anchoring each stitch in stable seam allowance rather than in the frayed edge.
Step 1: Inspect and prepare the seam
Turn the pants inside out and expose the entire failed section. Open the seam allowance gently so you can see where the original stitching ended, then trim only loose threads that would interfere with alignment.
Match the seam edges along the original crease. Pin or clip the edges every 3-5 cm, keeping the garment flat without stretching it.
You will know the preparation worked when: the original seam line continues naturally above and below the opening.
Common mistake: pulling the seam edges together too tightly. Excess tension creates a puckered ridge and changes the garment’s fit.
Step 2: Anchor matching thread
Cut 45-60 cm of strong polyester thread and thread a sharp needle appropriate to the fabric. Knot the thread, then bring the needle up from inside the seam allowance so the knot remains hidden.
For thick denim, use one strand of heavy thread rather than doubling a thread that may create bulky knots. For fine wool, use a matching fine thread and a smaller knot.
You will know the thread is anchored when: a light tug does not pull the knot through the weave.
Common mistake: beginning directly at the edge of the opening. Start 5-8 mm before the failed stitching and take two small anchoring stitches through stable material.
Step 3: Close the opening with a ladder stitch
Take a 2-3 mm horizontal stitch in the folded seam allowance on one side. Move across the opening and take an equal stitch in the opposite seam allowance, then alternate sides along the entire rip.
The thread should form a loose ladder while the needle is moving. Pull the thread gently every four to six stitches, allowing the edges to meet without gathering. Continue 5-8 mm past the visible opening and secure the end with two small backstitches.
You will know the stitch worked when: the seam closes from the outside and the thread disappears into the fold when tension is applied.
Common mistake: making long stitches. Stitches longer than about 4 mm place more load on each individual section and can reopen under sitting or bending.
Bury the thread tail inside the seam allowance and trim it. Turn the pants right side out before pressing, because ironing directly over a bulky knot can leave a permanent mark.
How do you repair a hole or ripped denim area?
Repair a hole in denim with an inside patch followed by machine darning, zigzag stitching, or controlled hand stitching. The backing patch should extend at least 15 mm beyond the hole, and the reinforcement should continue into visibly weakened fabric, not stop at the edge of the opening.
Step 4: Stabilize the damaged area
Place the pants flat and inspect the right side and wrong side. Trim long unstable threads, but do not enlarge the hole by cutting away sound denim. If the surrounding fabric feels thin, extend the planned patch 2-3 cm beyond the visible damage.
Cut a lightweight-to-medium cotton or denim patch with rounded corners. A patch that measures 5 by 7 cm can reinforce a 2 by 4 cm hole, provided the surrounding fabric is stable.
Position the patch on the inside. Use temporary fabric adhesive, pins placed outside the stitch path, or a few long basting stitches to hold it in place.
You will know the backing is positioned correctly when: the patch lies flat and extends beyond every frayed section.
Common mistake: using a patch that matches only the hole’s dimensions. The repair then transfers stress to the weak perimeter and fails beside the original patch.
Step 5: Darn denim with a sewing machine
Set the machine to a straight stitch around 2.0-2.5 mm or a narrow zigzag if the fabric needs controlled flexibility. Lower the presser foot and sew forward and backward across the patch, keeping the rows close enough to form a stable fabric bridge.
Work first along the length of the tear, then across it if the hole needs multidirectional reinforcement. Extend the stitching 10-15 mm beyond the visible damage, tapering the ends rather than creating a hard rectangular boundary.
A darning foot can improve control, but ordinary presser feet work for small repairs. Reduce speed when crossing thick seam intersections, and use the hand wheel if the needle struggles through multiple layers.
You will know the darning worked when: the hole is supported from the inside, the patch does not shift, and the repaired area bends without a rigid ridge.
Common mistake: sewing dense rows only over the missing center. A dense center with no perimeter reinforcement creates a stress boundary where the surrounding denim tears next.
For a hand-sewn denim repair, use small overlapping running stitches in several directions. Sashiko-style grids can be attractive and durable, but they are visible by design and require a stable patch underneath for a large hole.
Can you repair ripped pants without sewing?
You can repair ripped pants without sewing by applying an internal fusible patch or fabric-repair tape, provided the fabric tolerates heat and the damage is not a high-stress structural failure. Iron-on repairs are fastest, but they are less dependable for crotches, inner thighs, seat seams, and frequently stretched garments.
Step 6: Apply an internal iron-on patch
Turn the pants inside out and place the garment on a hard, heat-safe ironing surface. Do not use a padded bed or soft towel because uneven pressure can leave part of the adhesive unbonded.
Trim dangling fibers that prevent the edges from lying flat. Cut the fusible patch 15-20 mm larger than the damaged zone and round all corners to reduce peeling.
Align a clean tear edge to edge when possible. For a missing section, do not force the edges together because the garment will pucker; let the patch bridge the opening.
Place the adhesive side against the wrong side of the garment. Cover it with the manufacturer’s pressing cloth or parchment if specified, turn off steam, and press straight down for the product’s stated time, commonly 15-20 seconds.
Lift the iron rather than sliding it. Reposition it until the entire patch receives heat and pressure. Let the area cool completely for at least five minutes before bending or wearing the pants.
You will know the bond worked when: the patch edges lie flat, no corner lifts with a fingernail, and the fabric remains aligned after cooling.
Common mistake: using maximum heat automatically. Excessive heat can melt synthetic fibers, flatten texture, discolor fabric, or damage elastane even when the adhesive bonds.
Fabric adhesives have no universal wash-life. Product formulation, fiber content, heat, friction, and laundering determine durability; a low-stress patch may last through many washes, while an inner-thigh repair can loosen quickly.
Which pants repair method is strongest?
Machine stitching with an internal fabric backing is usually the strongest DIY repair for denim, workwear, and high-stress areas. Hand sewing is the best appearance-first choice for a separated seam, while iron-on patches provide the fastest repair but should not be treated as a permanent solution for repeated stretching or abrasion.
| Method | Setup cost | Repair time | Best stress level | Appearance | Main limitation |
|---|---|---|---|---|---|
| Ladder stitch | $2-$5 | 15-30 minutes | Low to medium | Nearly invisible | Poor choice for missing fabric |
| Machine straight stitch | $80-$200 machine cost | 5-15 minutes | Medium to high | Visible on some fabrics | Requires access and skill |
| Machine darning | $80-$200 machine cost | 15-45 minutes | High | Visible reinforcement | Can become stiff if too dense |
| Internal iron-on patch | $3-$8 | 5-15 minutes | Low to medium | Low visibility | Heat and wash limitations |
| Hand darning | $2-$10 | 30-60 minutes | Medium to high | Visible or blended | Time and tension control |
| Sashiko patching | $5-$15 | 45-120 minutes | Medium to high | Intentionally visible | Does not suit formal clothing |
| Professional reweaving | $25-$100+ | 1-7 days | Medium | Lowest visibility | Cost and color-matching limits |
A useful practitioner rule is to match the repair’s flexibility to the garment’s movement. A rigid iron-on patch across a stretchy seat can shift stress to the patch boundary, whereas a flexible stitched backing distributes force through more of the original fabric.
How should you repair different fabrics and locations?
Fabric type and damage location determine whether a repair must stretch, resist abrasion, preserve drape, or tolerate heat. Denim and canvas accept dense reinforcement, stretch pants need flexible stitches, and suit wool usually requires discreet reweaving rather than a visible patch.
Denim jeans and work pants
Use a cotton or denim backing and matching polyester thread. For a knee hole, a rectangular or organically shaped inside patch works well; for a crotch blowout, extend the patch several centimeters into surrounding thinning and taper the stitching at its ends.
Avoid a thick patch that creates a hard lump against the skin. A lightweight denim patch often outperforms heavy canvas because it bends with the garment.
Stretch denim, leggings, and jersey pants
Use a ballpoint or stretch needle and a narrow zigzag, stretch stitch, or hand stitch that permits movement. Do not pull the fabric while sewing, because stretched fabric can contract into puckers after the repair.
Iron-on products must explicitly list compatibility with elastane or synthetic stretch fibers. A hot iron can permanently distort these garments.
Chinos and cotton twill
A matching inside patch with a short straight stitch usually provides a clean repair. For a seam opening, recreate the original seam line and backstitch over the first and last 1-2 cm.
Cotton twill often shows needle holes less than wool, but a contrasting patch can still show through lightweight beige fabric.
Suit trousers and wool pants
Take expensive, lined, or formal wool trousers to a tailor when the tear affects the seat, pocket, crease, waistband, or visible leg. Professional reweaving replaces missing yarns and can preserve the fabric’s surface better than a patch.
A home iron-on patch is a poor choice for fine wool because it can create shine, stiffness, and an obvious color or texture difference. A tailor may instead reconstruct the seam, darn from the inside, or reweave the hole.
Nylon hiking pants and shell fabric
Use manufacturer-approved repair tape or a nylon-compatible adhesive patch. Clean the surface according to the product instructions, round the corners, and avoid sewing through waterproof membranes unless you can reseal the needle holes.
For rainwear, a stitched repair without seam-sealing can leak even when the tear is mechanically closed. Gear repair products such as Gear Aid Seam Grip are designed for some outdoor materials, but compatibility must be checked before application.
| Damage location | Why it fails | Reinforcement rule | Suitable finish |
|---|---|---|---|
| Side seam | Original seam thread breaks | Recreate seam 5-8 mm past opening | Ladder or straight stitch |
| Crotch seam | Repeated tension and body movement | Patch 20-30 mm beyond weak area | Dense zigzag or darning |
| Inner thigh | Friction thins fabric gradually | Reinforce before a hole appears | Soft inside patch |
| Knee | Bending and surface abrasion | Extend patch 15-25 mm around hole | Machine darning |
| Pocket corner | Pulling from contents | Use short backstitches in stable fabric | Inside reinforcement |
| Waistband | Multiple fabric layers and tension | Open waistband only if necessary | Tailor or machine repair |
| Trouser hem | Footwear catches edge | Recreate fold and original hem line | Blind or slip stitch |
What mistakes make a pants repair fail?
Most failed pants repairs result from anchoring in weak fabric, using an unsuitable needle or heat setting, or creating an abrupt stiff boundary around a flexible garment. A durable repair must spread load gradually into healthy material and preserve the fabric’s required movement.
The stitches are pulling out
The repair was placed too close to the frayed edge or stopped before reaching stable fabric. Remove the weakest stitches, enlarge the backing, and restart 5-15 mm beyond the damaged boundary.
The fabric puckers
Puckering usually means the thread is too tight, the fabric was stretched during sewing, or the stitch length is too short for the material. Test on a scrap, reduce upper tension slightly, and let the fabric lie naturally under the presser foot.
The machine makes loops underneath
Check threading with the presser foot raised, replace a bent or dull needle, and inspect the bobbin placement. Loops can indicate incorrect threading, unsuitable tension, or a needle that cannot form a clean loop through thick layers.
The iron-on patch peels
Peeling commonly results from insufficient heat, incomplete pressure, steam, contamination, or sharp patch corners. Repress only if the product permits it; otherwise remove the failed patch, clean the area, cut a larger rounded patch, and follow the adhesive manufacturer’s temperature and time instructions.
The repair feels stiff or scratches skin
The backing or adhesive is too heavy for the garment, or the stitching density is excessive. Replace it with a lighter patch, trim bulky seam allowances, and cover the inside with a soft fabric layer when the location touches skin.
The tear returns beside the repair
The repair stopped at the visible hole instead of the weakened zone. Inspect the garment after wearing it, then extend reinforcement into thinning fabric with tapered stitching rather than adding a small patch directly over the new split.
How much does pants repair cost and how long does it last?
A simple home repair typically costs $2-$15 in materials and takes 5-60 minutes, while professional pants repair commonly costs $15-$100 or more depending on fabric, lining, location, and whether reweaving is required. Longevity varies more by stress and surrounding fabric condition than by stitch type alone.
| Repair situation | DIY material cost | Typical DIY time | Typical professional price | Practical lifespan |
|---|---|---|---|---|
| Open ordinary seam | $2-$5 | 15-30 minutes | $10-$25 | Months to several years |
| Small cotton tear | $3-$8 | 20-40 minutes | $15-$35 | Months to years |
| Jeans knee hole | $3-$10 | 15-45 minutes | $20-$45 | Months to years |
| Crotch blowout | $5-$15 | 30-60 minutes | $25-$60 | Several months to years |
| Wool trouser tear | $5-$15 | Not recommended | $35-$100+ | Depends on reweaving quality |
| Waterproof outdoor pants | $5-$15 | 5-20 minutes | $20-$60 | Several outings to multiple seasons |
These are typical consumer and alteration-shop ranges, not guaranteed prices. A tailor may charge more for lined garments, unusual colors, hand reweaving, rush service, or repairs that require removing and replacing a waistband or pocket.
Wash repaired pants inside out and use the gentlest cycle allowed by the care label. Avoid fabric softener on areas repaired with fusible adhesive, and do not tumble-dry a newly bonded patch until the product instructions allow full laundering.
When should you use a tailor instead?
Use a tailor when the tear affects fine wool, a lined garment, a waistband, a pocket structure, a pressed crease, or a large area of missing fabric. Professional repair is also the better choice when the pants are expensive, formal, irreplaceable, or cut in a way that makes inside access difficult.
A tailor can distinguish seam reconstruction from reweaving. Seam reconstruction restores the original joining line, while reweaving rebuilds missing yarns so the repaired surface blends with the surrounding cloth. Neither process can perfectly restore every fabric, especially when the original material has faded, stretched, or become brittle.
Do not send heavily soiled pants for repair without asking about cleaning requirements. Dirt can hide additional thinning and may prevent a shop from assessing the true repair boundary.
How should you choose the repair?
Choose a ladder stitch for a clean, low-stress seam opening, machine darning for denim or workwear holes, a fusible patch for a quick temporary fix, and professional reweaving for valuable formal trousers. If the fabric around the rip is thin, reinforce the surrounding zone even when the visible opening is small.
Use this decision sequence:
- Is the original fabric present on both sides?
Use a ladder stitch or machine straight stitch for a separated seam. - Is fabric missing?
Add an inside patch before stitching or darning. - Is the area stretched, rubbed, or repeatedly loaded?
Prefer flexible machine stitching and a broad backing patch. - Does the fabric tolerate heat?
If not, avoid iron-on products and use sewing or compatible repair tape. - Must the repair be invisible?
Choose matching thread, inside reinforcement, or a professional tailor. - Is the garment already thinning beyond the hole?
Reinforce the whole weak zone, not just the opening.
FAQ
Can fabric glue repair ripped pants permanently?
Fabric glue can hold a small, low-stress tear when the adhesive matches the fiber content and the surface is clean. Fabric glue is not a dependable permanent solution for crotch seams, inner thighs, waistbands, or garments that stretch repeatedly. A stitched backing patch usually provides better mechanical reinforcement.
Can I repair ripped pants with dental floss?
Dental floss can temporarily close a thick seam when ordinary thread is unavailable, but it is too bulky for many garments and may cut into lightweight fabric. Use heavy polyester or purpose-made jeans thread for a durable repair, then replace an emergency floss repair when practical.
How do I fix pants ripped at the pocket?
Turn the pants inside out, empty and stabilize the pocket, then sew the opening with short backstitches or a machine straight stitch. Reinforce 5-10 mm beyond the tear and check the pocket corner for hidden stress. A small inside patch helps when the pocket fabric itself has become thin.
Can a washing machine make a repaired rip worse?
A washing machine can enlarge a weak repair through agitation, heat, and friction, especially when adhesive has not fully cured or the garment is washed right-side out. Follow the repair-product instructions, wash inside out, select the care-label cycle, and inspect the repair before machine drying.
How do I repair pants when the rip has frayed edges?
Trim only loose, unstable fibers and keep the opening aligned without stretching it. Place a backing patch beneath the frayed section, then stitch into healthy fabric at least 15 mm beyond the visible damage. Cutting away all frayed material can enlarge the hole and remove useful structural yarns.
Is visible mending stronger than an invisible repair?
Visible mending can be stronger when it uses a broad backing patch and repeated stitches across the weakened area. Appearance and strength are separate properties: an invisible ladder stitch suits an intact seam, while a visible darning grid is often better for a missing-fabric hole in denim.
The Bottom Line
To repair ripped pants successfully, diagnose the damage first, extend reinforcement into healthy fabric, and match the method to the garment’s stress and fiber content. Use a ladder stitch for an open seam, inside-patch darning for denim and high-friction areas, and an iron-on patch only when speed matters more than maximum durability. A careful repair should close the opening without puckering, scratching, or creating a new stress boundary.


